The Charts Pane is available from any View in most Entities, but is often hidden on the side and easy to overlook. This pane provides a quick, high-level view of any single System Chart for that entity. Read More
Use Zoho CRM’s built-in scoring rules to auto-score and prioritize your leads! You can define sets of rules related to values of fields in the leads module, email activity, survey activity (using Zoho Survey) and document Signing activity (if you’re using Zoho Sign) Here’s how… Read More
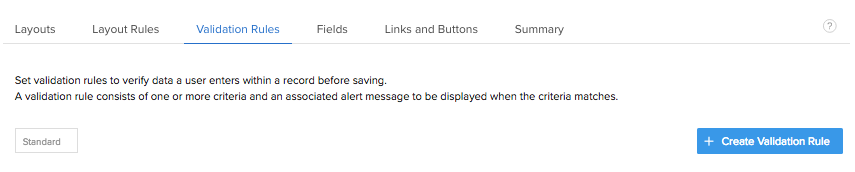
Another new feature in 2018 is the ability to set up validation rules for individual fields and customize the error message. Lets take a number field for example, say you want to restrict the value of the field to less than 90 – here’s how to do it:
- Setup->Customization->Modules and Fields
- Click the module your number field is in
- click the Validation Rules Tab
- Click the Blue Create Validation Rule button
- Select the field and choose the rule, in our case Demo Number is greater than 90, then click Next:

- Lastly – enter your error message in our case “Please enter a value less than 90”:

Now when your users try to enter a value outside of the set range this happens:
New for 2018, Zoho CRM has introduced the Portal (Enterprise edition)!! Give your customers/vendors self-service access to the information they need with Zoho CRM’s new Portal feature. Its easy to set up and use too! Lets walk through setting up a customer portal…
STEP 1: Configure your Portal
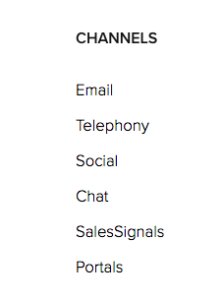
- Setup(tool icon, upper right)-> Channels->Portals
- Enter a name to complete your portal URL (if this if the first portal you are setting up)
- Create your first portal
- Name it (e.g. Customer)
- Select Which modules you will grant access to (e.g. Contacts, Quotes, Invoices, Cases)
- For each module, step through and select which fields a portal user can see
- Click Finish
STEP 2: Invite Customers to your portal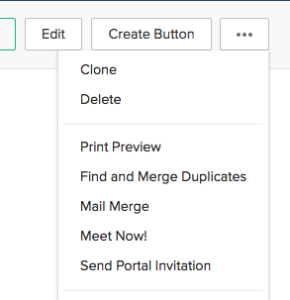
- Open the contact record of the customer you want to invite
- Click the “…” menu (upper right), then select Invite to Portal
- Select the portal (if you have more than one)
- Send the invite.
STEP 3: Customer Signs up for portal access
- Customer Receives Invite, clicks link and sets up a password.
- Customer can now see ONLY the information related it his/her contact record that you granted permission to!
customers can login and check on the status of their orders, or cases, update their contact info, etc… and the best news… it’s FREE!
So this isn’t as much a tip but more of a discussion (welcoming thoughts and comments below). Had a client that wanted 2 factor authentication, but wanted more than just the typical “text me when I login from a different machine” type of security. There’s definitely some considerations here…. Read More
Working with my home page, I wanted to add in some charts to make it a bit fancier. We’ve discussed lists (views) and hiding things on the home page but not how to do charts. Here, we’ll do a chart or two but also discuss the issue of reports created in classic (it’s easy, but has to be noted). Read More
We actually have Gmail as our email server backend here at The Marks Group, so I’m going to show how to connect my Gmail (in Chrome) to Salesforce, allowing me to link messages if need be. Most users will stumble on to this if they have Exchange or Office 365 (hosted Exchange), but I don’t so have to go this route. Read More
Send your CRM documents (e.g, Quotes) out for signatures by adding Zoho Sign to your zoho app suite! Zoho Sign is a free app with your CRM subscription. Once you have a Zoho Sign account, you can install the Zoho Sign extension from the CRM marketplace. Now you’re ready to send docs for signatures! See Detailed instructions below: Read More
Did you know you can set the tabstop (field order) for the fields on the top half of the contact record?
1. Right click on the field, select Properties.
2. Go to the Layout tab.
3. Set the Position number to correspond to the tabstop order you want to use.
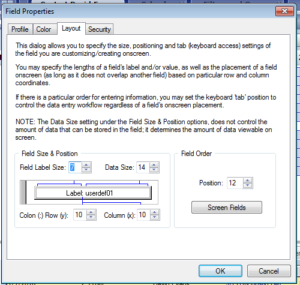
Note: You will need to set ALL field positions for this to work correctly. Try it and have fun!
Did you know you can control how picklists behave for each field by clicking the “Settings” button?
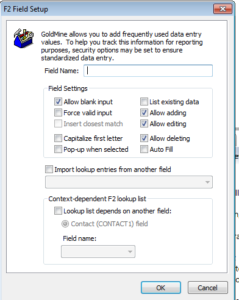
Some popular configuration choices include;
- Turning off “Allow Blank Input”essentially turns the field required.
- “Force Valid Input” ensures that a valid picklist item is used to fill the field.
- “Pop up When Selected” prompts the user with the picklist when they click into the field.
- Turning off “Allow adding/editing/deleting” makes it so the non-master users can’t edit the picklist.
Lock down that data and have fun!