In our last blog, we broke down the Salesforce Flow Builder. Now we are ready to build a Salesforce Flow.
Step 1: Determine What Do You Want The Salesforce Flow To Do
The first step with any Salesforce Flow is to define what you want it to do. It is always helpful to plan out how you want your process to work before you try to automate it.
For this blog, we are going to keep it simple and build a flow that will include an input screen for the user to capture information about an account. The purpose of the flow is to streamline what the user has to enter and provide a clear process for them to follow so you can ensure the key information is captured.
Step 2: Access Salesforce Flow Builder
To access Salesforce Flow Builder:
- Go to Setup and type “Flows” in the Quick Find box
- Select Flows and click New Flow
- Choose Screen Flow from the various options and Create
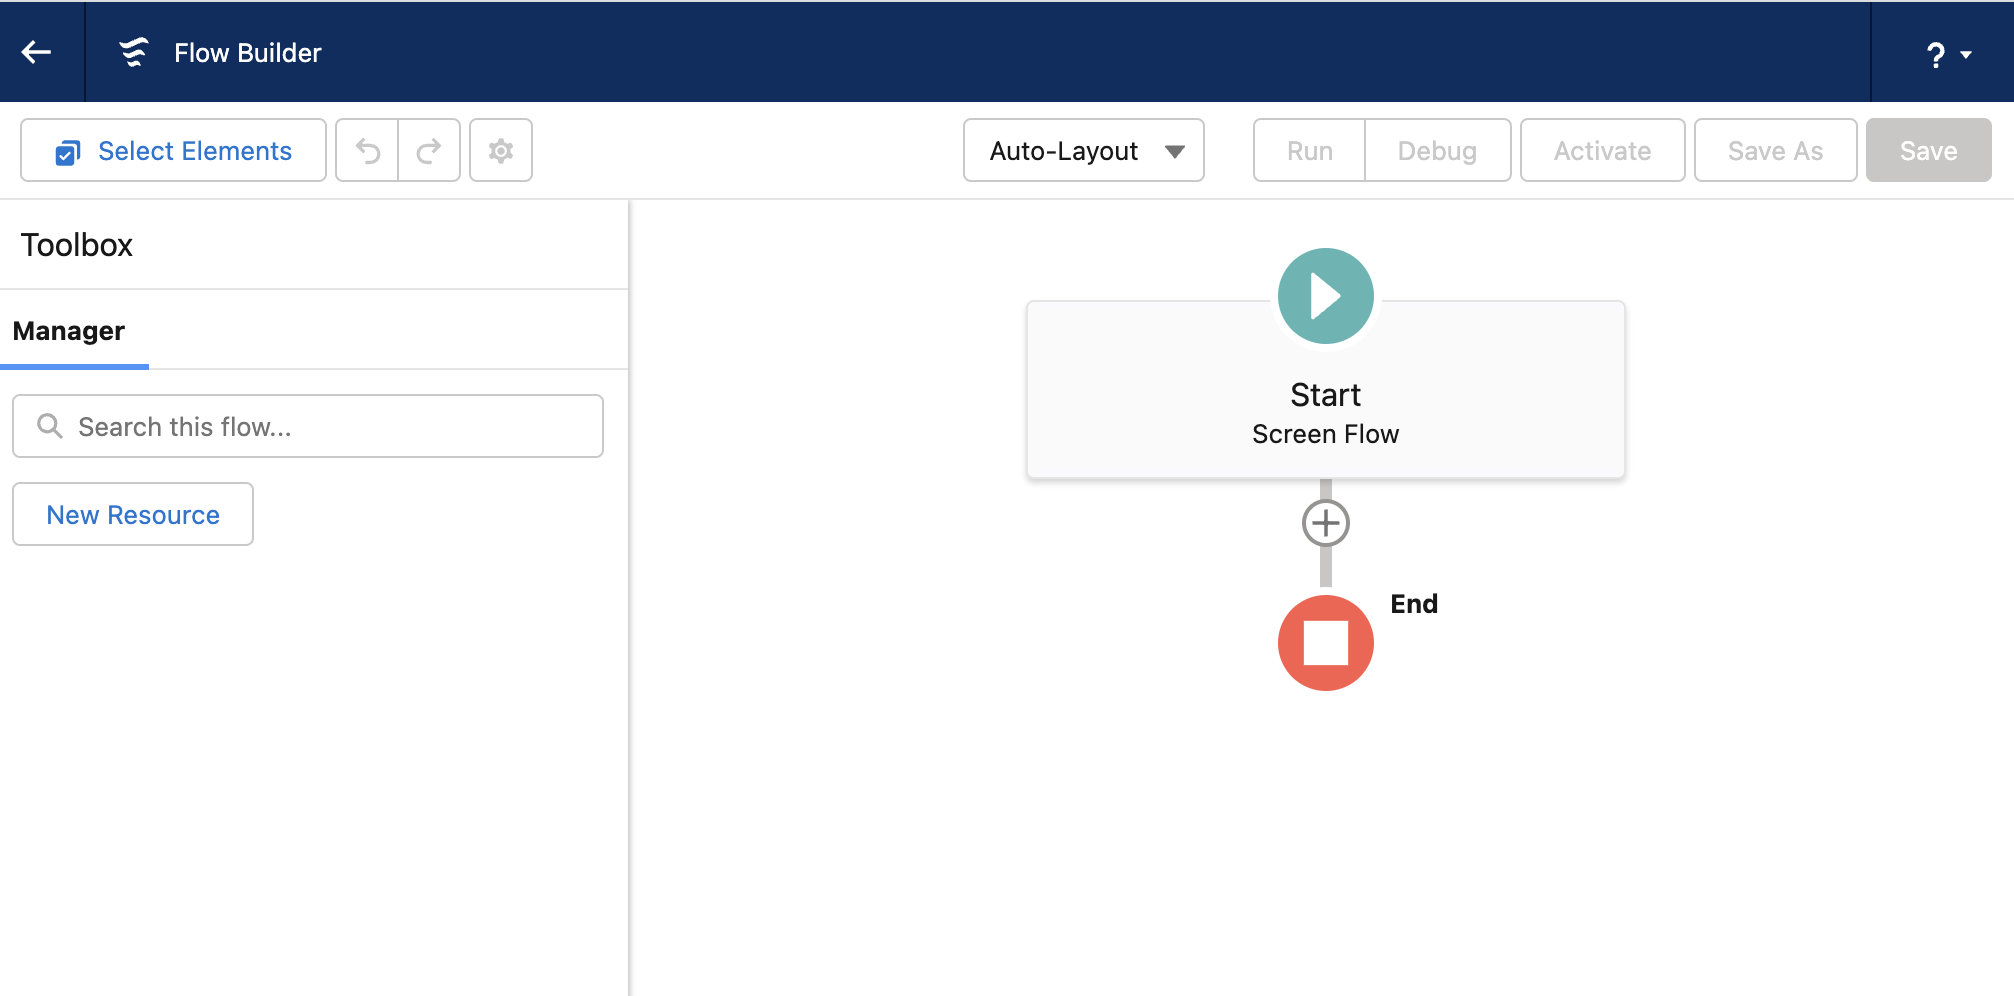
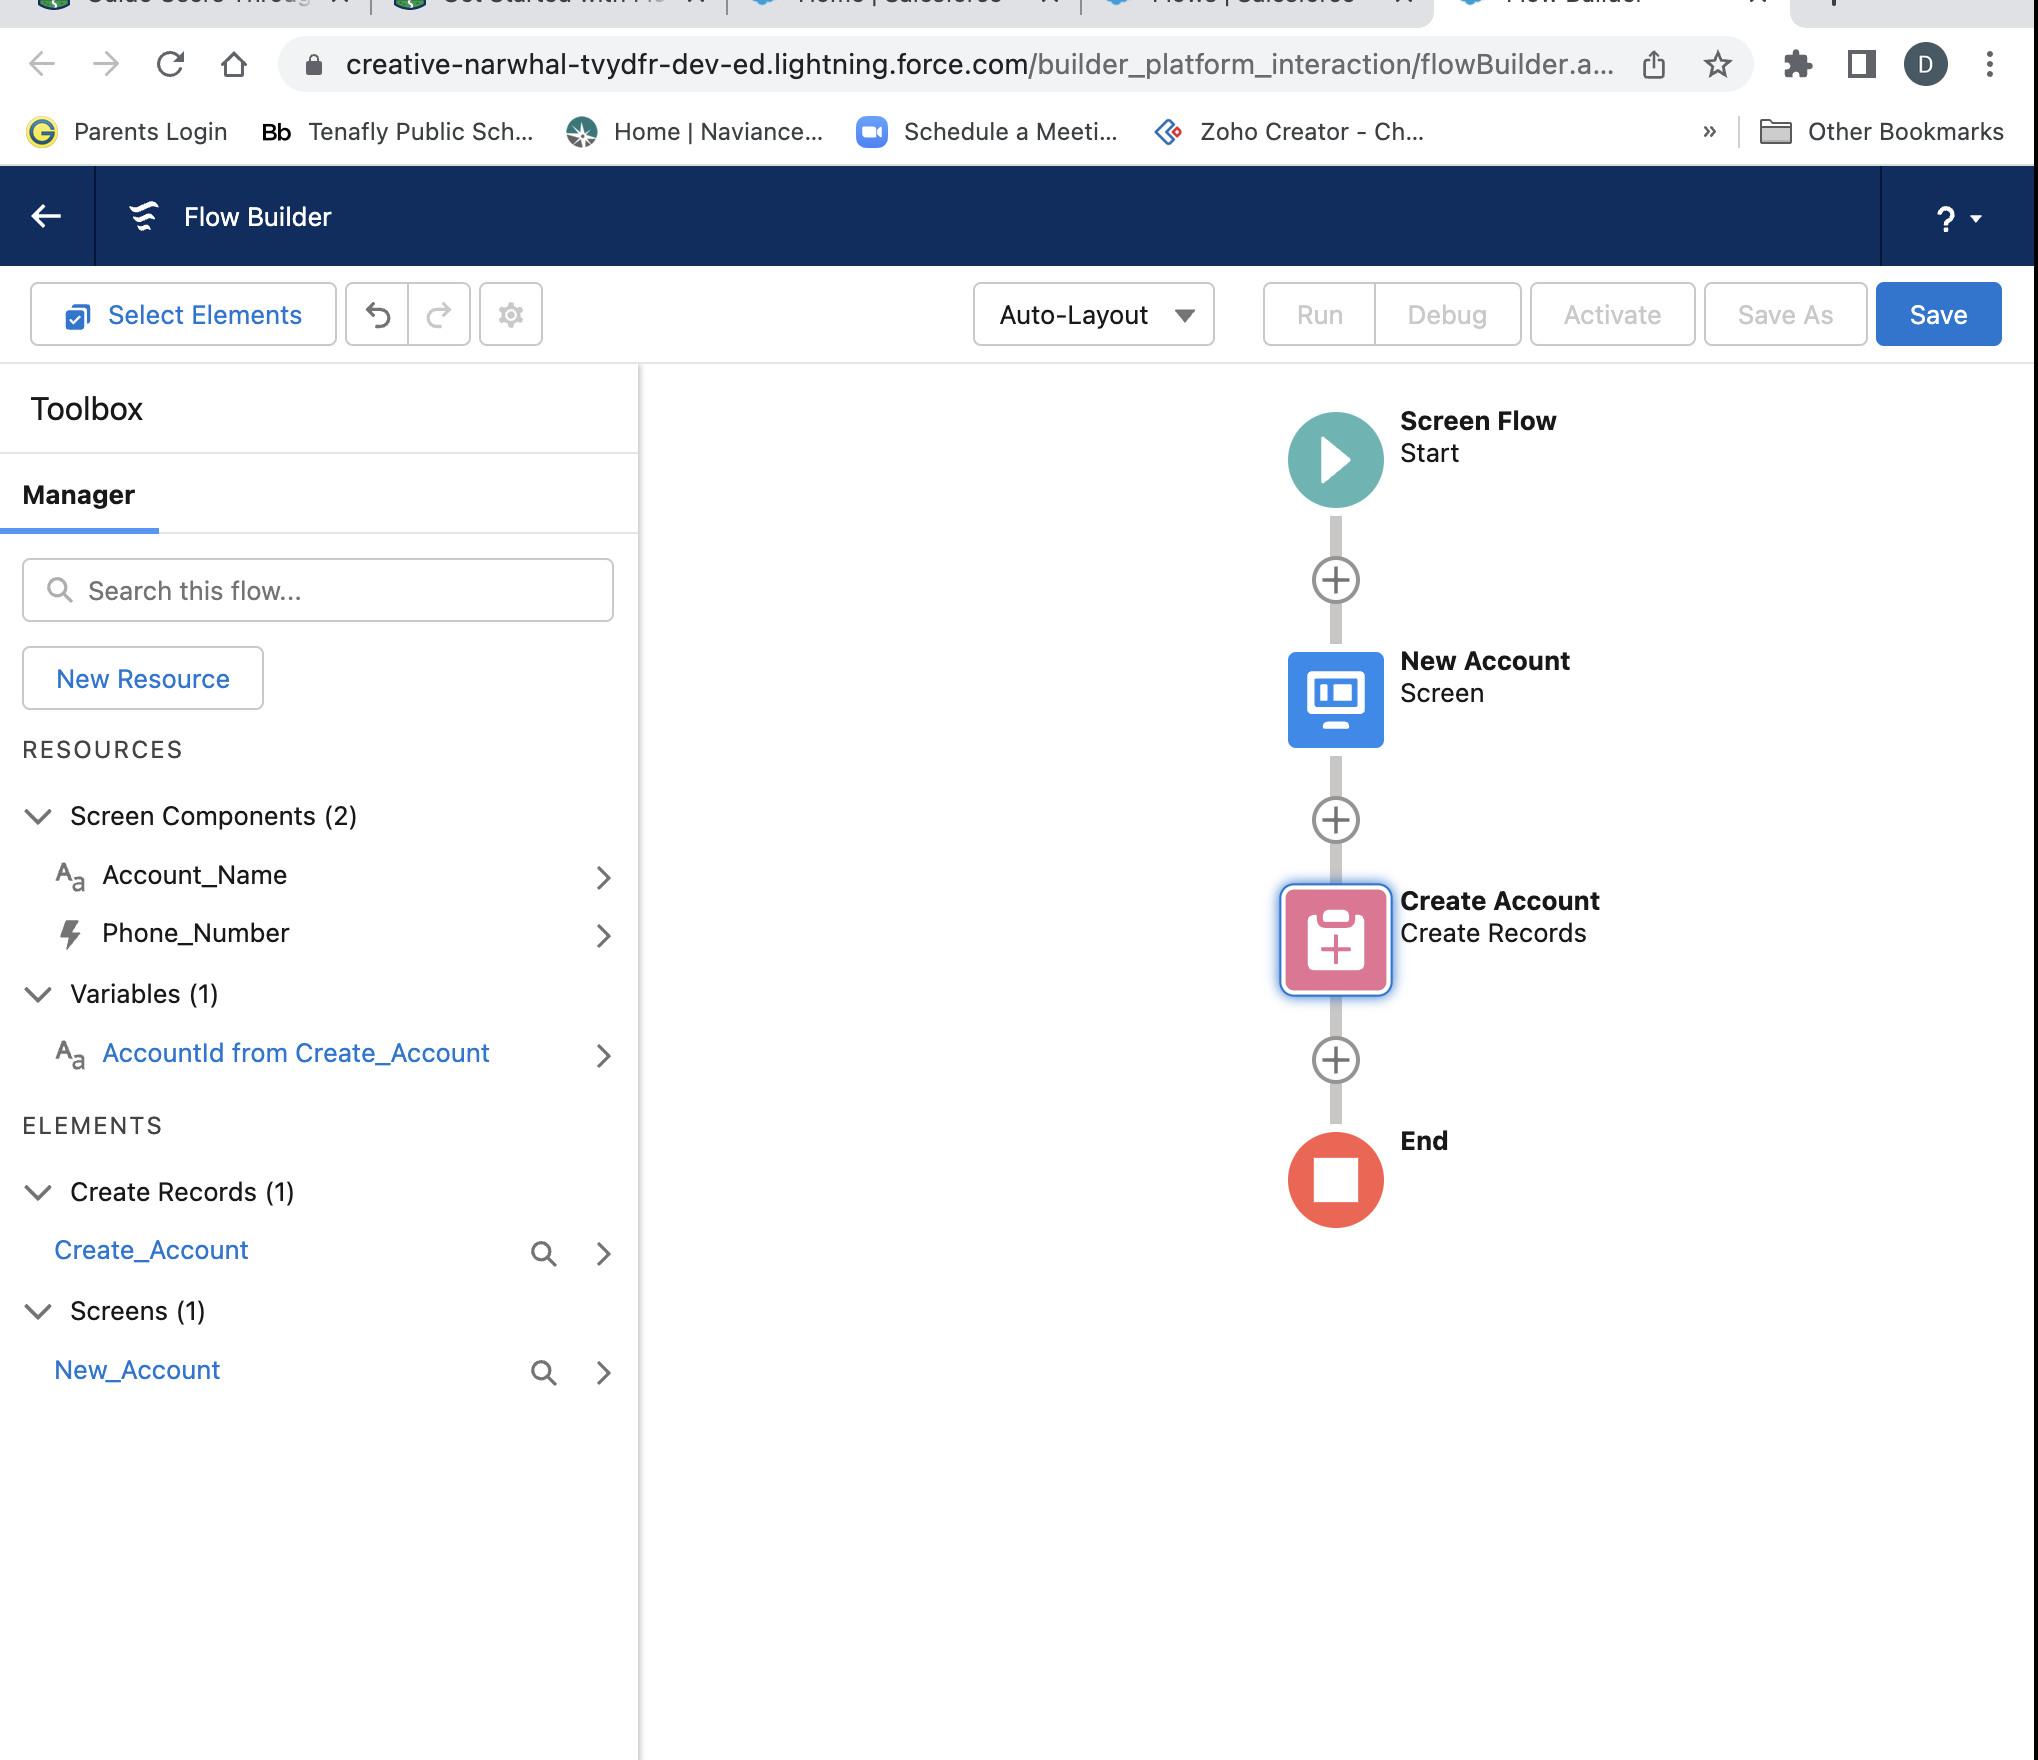
You will now be in Flow Builder (see screenshot below) and can start building the flow.
Step 3: Add a Screen to Collect User Input
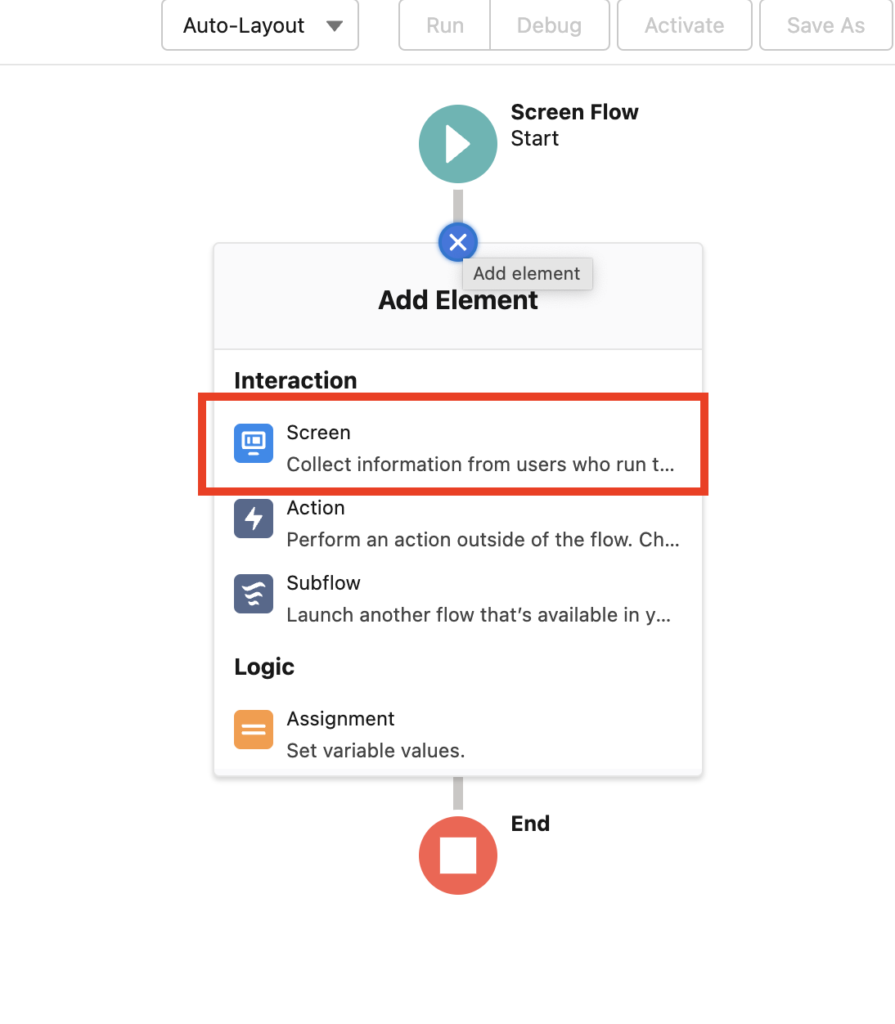
The first thing you want to do is add the screen to collect the new account information from the user.
- Click on the “+” in the canvas and then select Screen from the list of elements
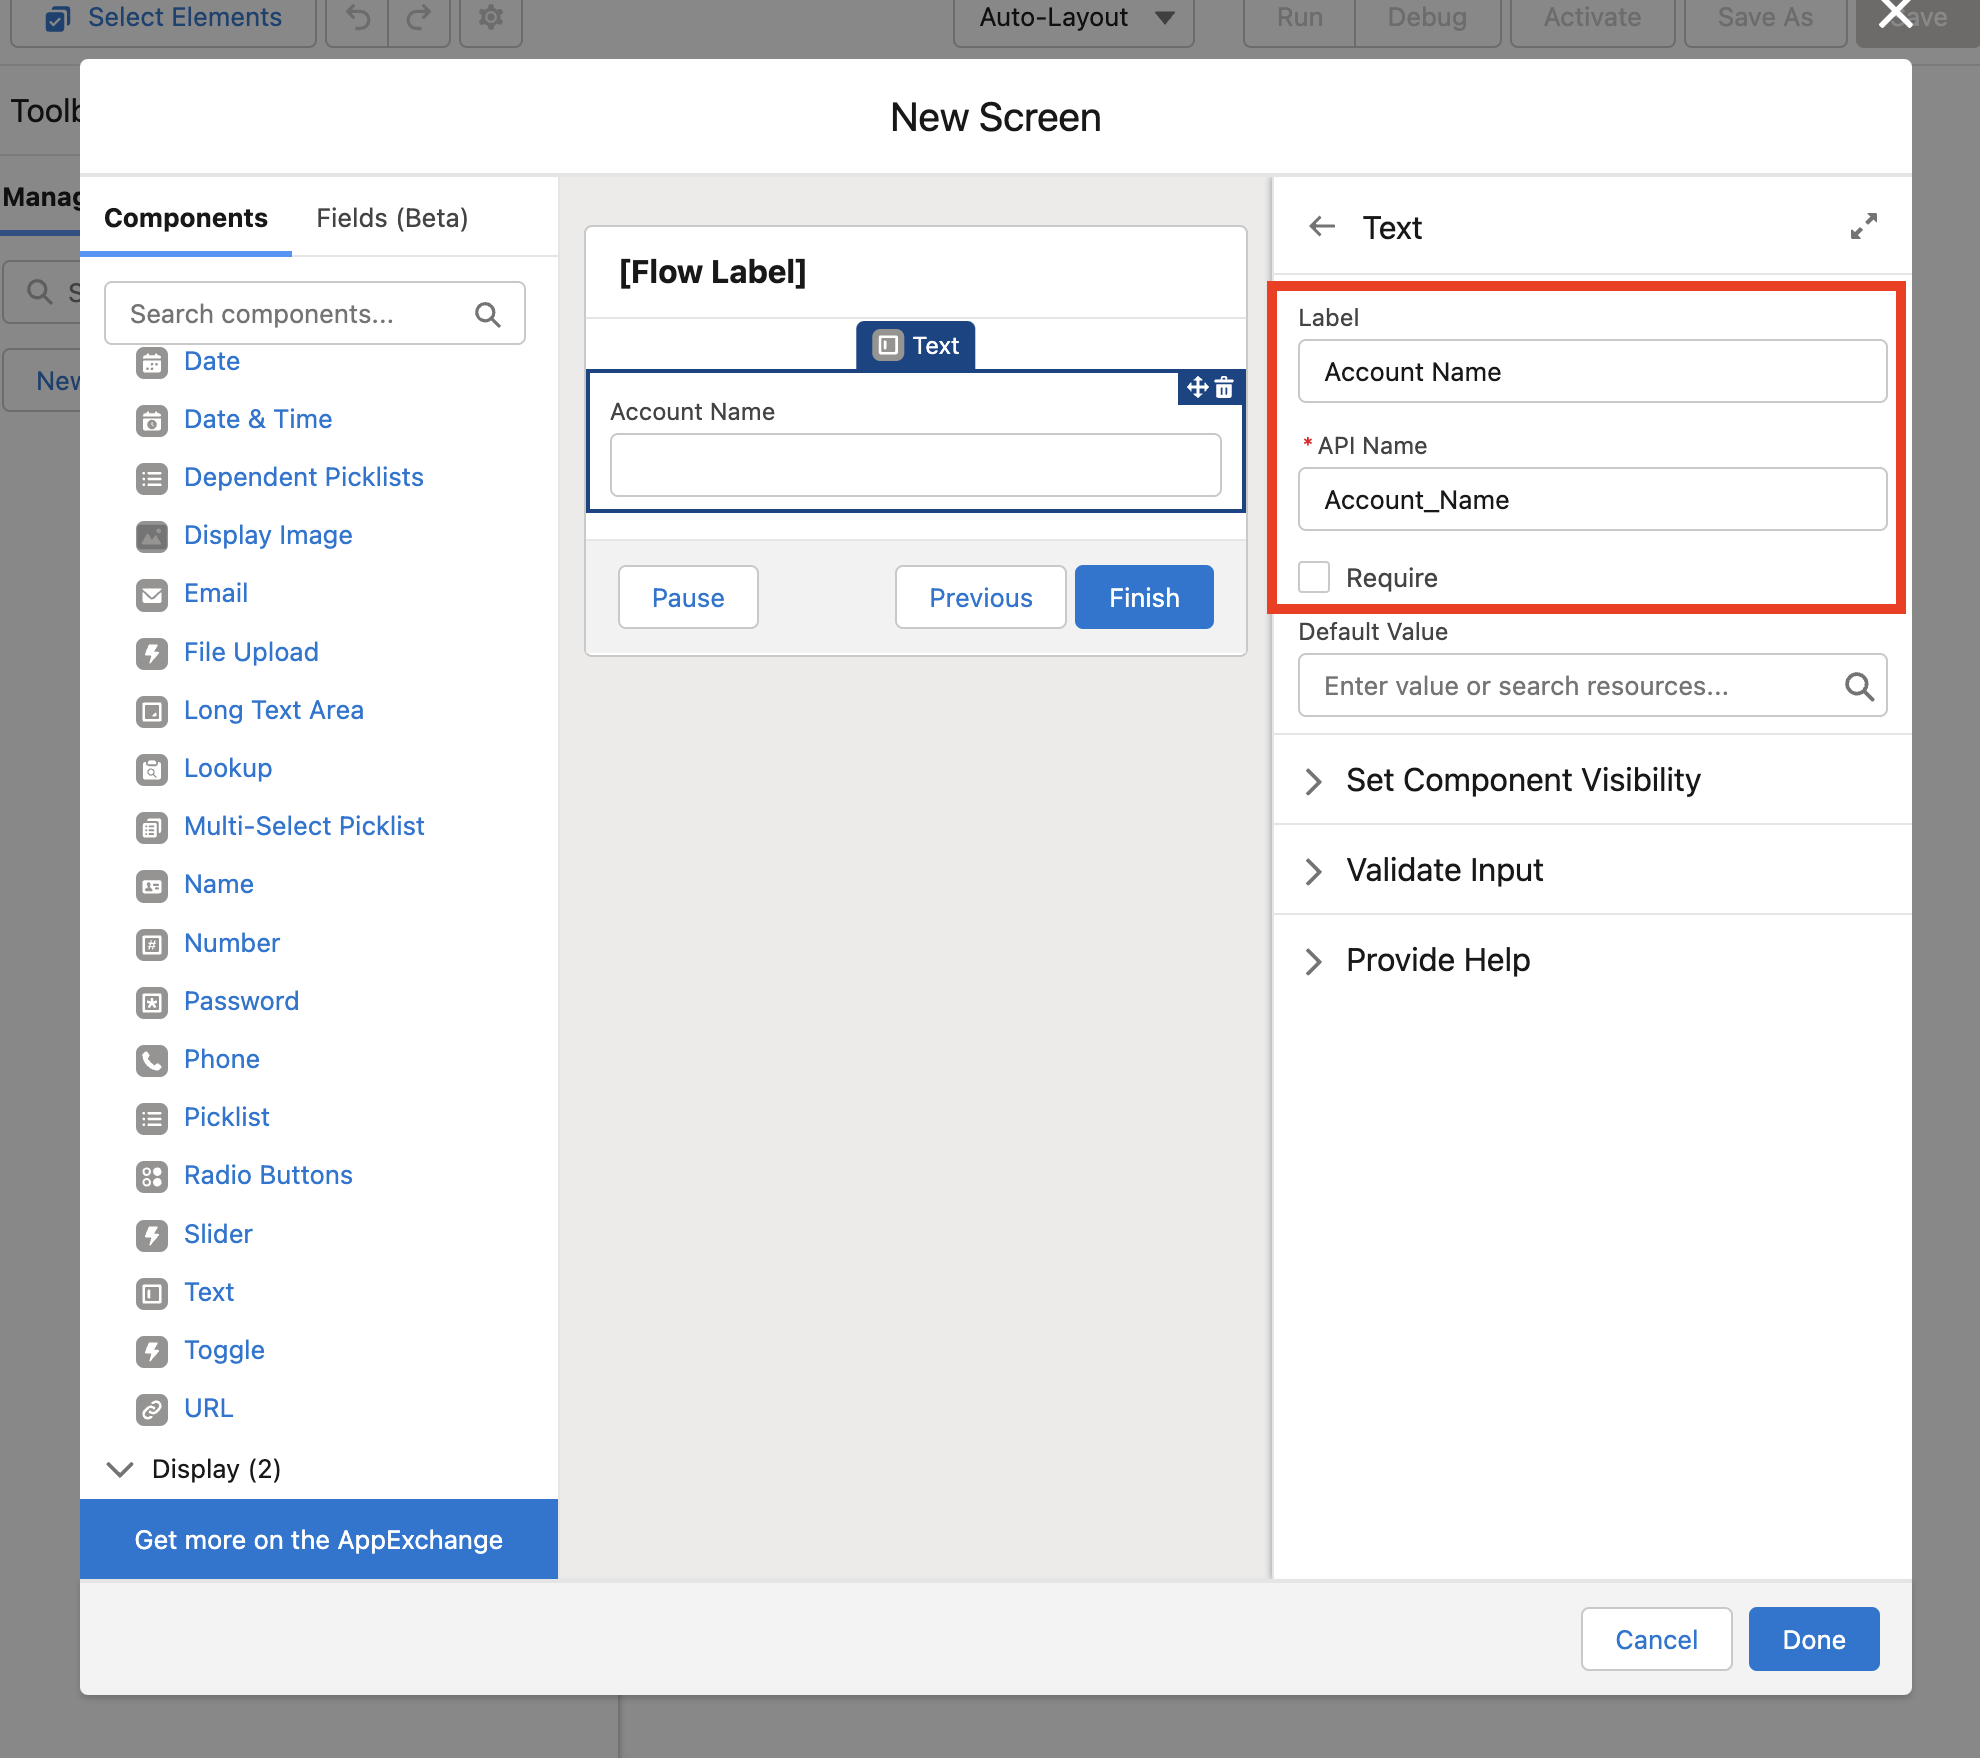
 Enter the “New Account” in the Label field on the right
- Select Text in the component list in the left panel (scroll down)
- Click on the Text Screen below the Flow Label and enter “Account Name” in the Label and check Require

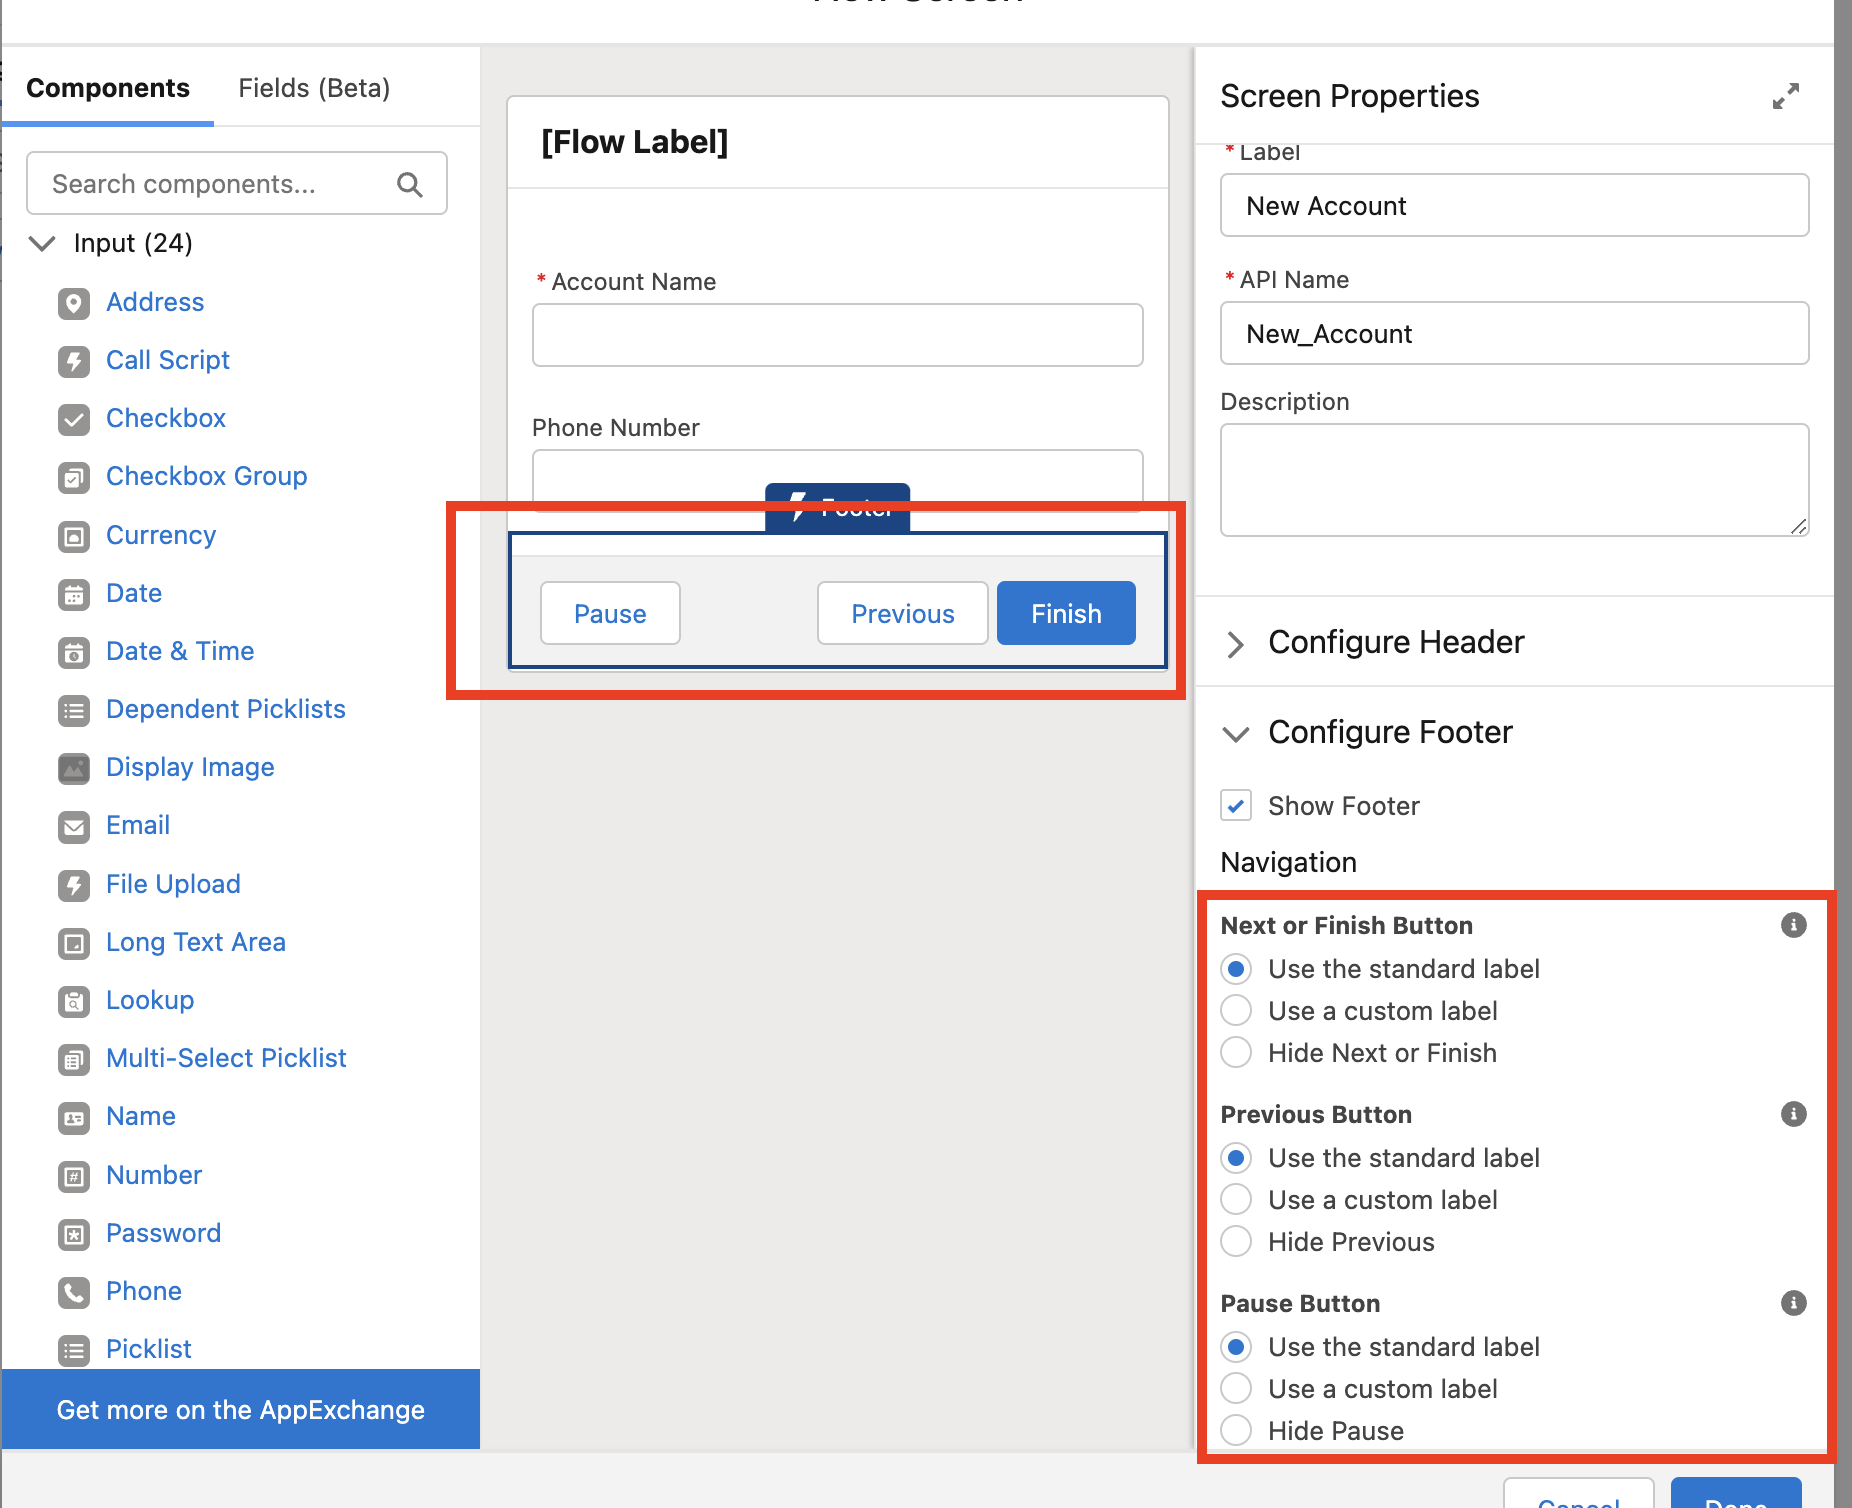
 To add a phone number component, select Phone in the component list on the left and enter “Phone Number” for the label and “Phone_Number” for the API Name is updated as well.
- Click on the footer (box below Phone Number) and then click on Configure Footer in the right panel
- Click to hide the Previous and Pause buttons
 Click Done and your screen is now designed
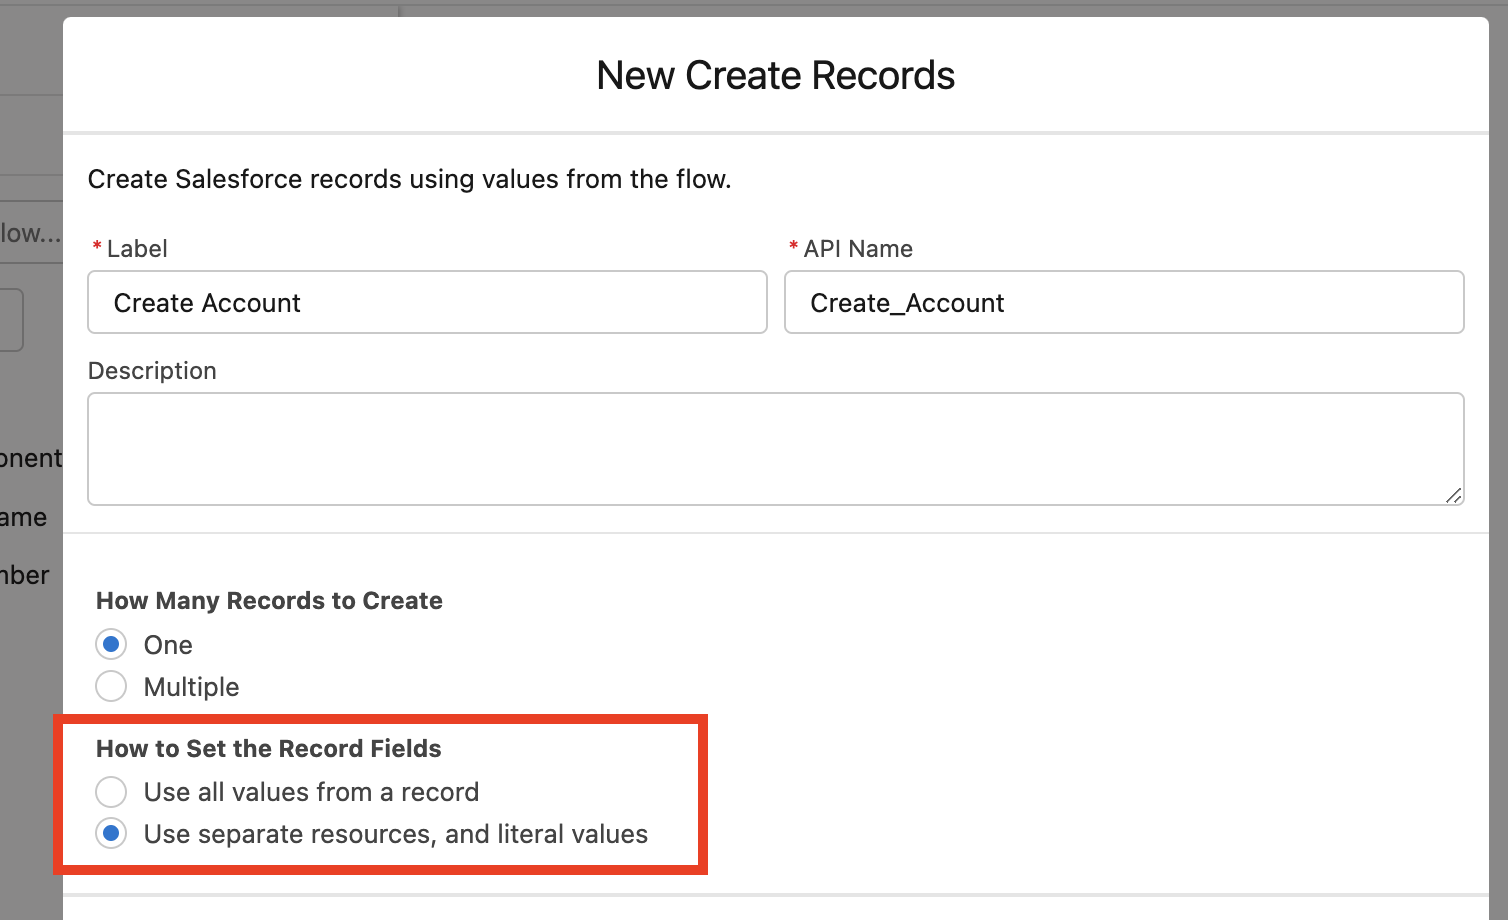
Step 4: Add Create Records Element to Create Records
- Within the Salesforce Flow Builder canvas, click “+” and then scroll down to the Data section of the Element window and select Create Records
- Within the window, type “Create Account” and then check “Use seperate resources, and literal values” under How to Set the Record Fields
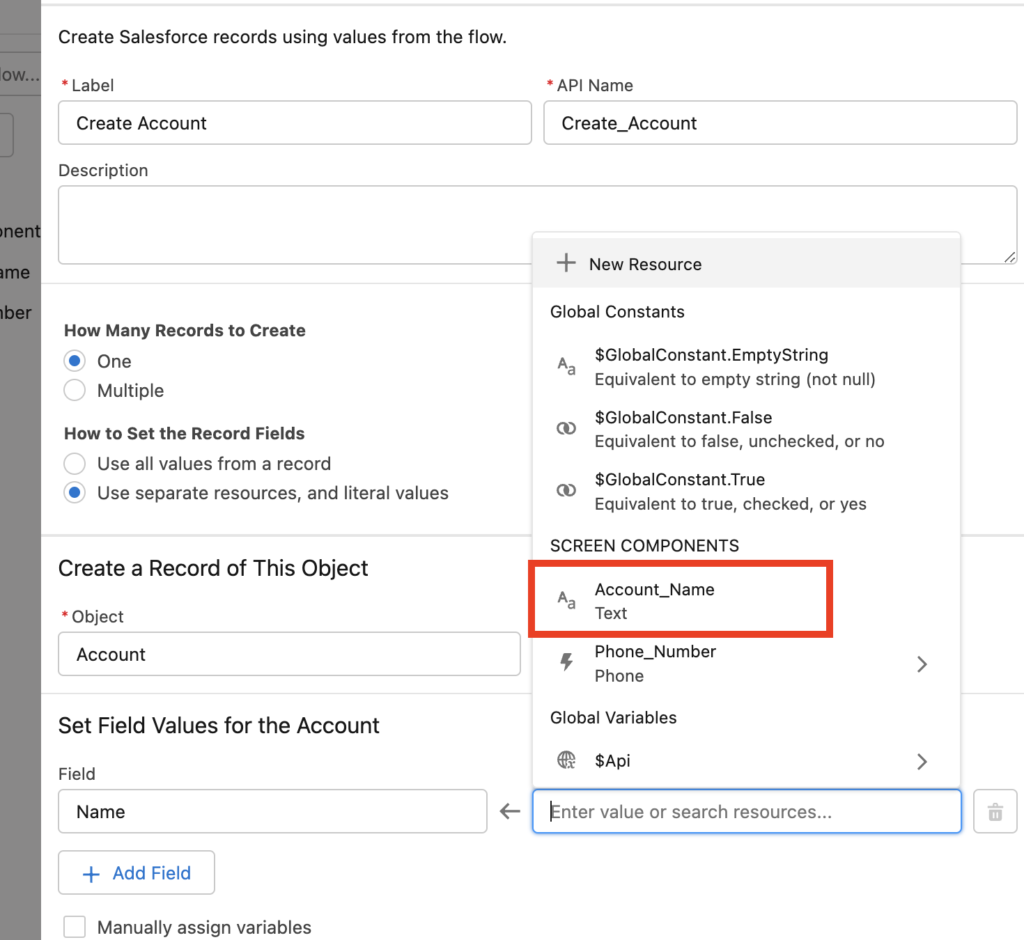
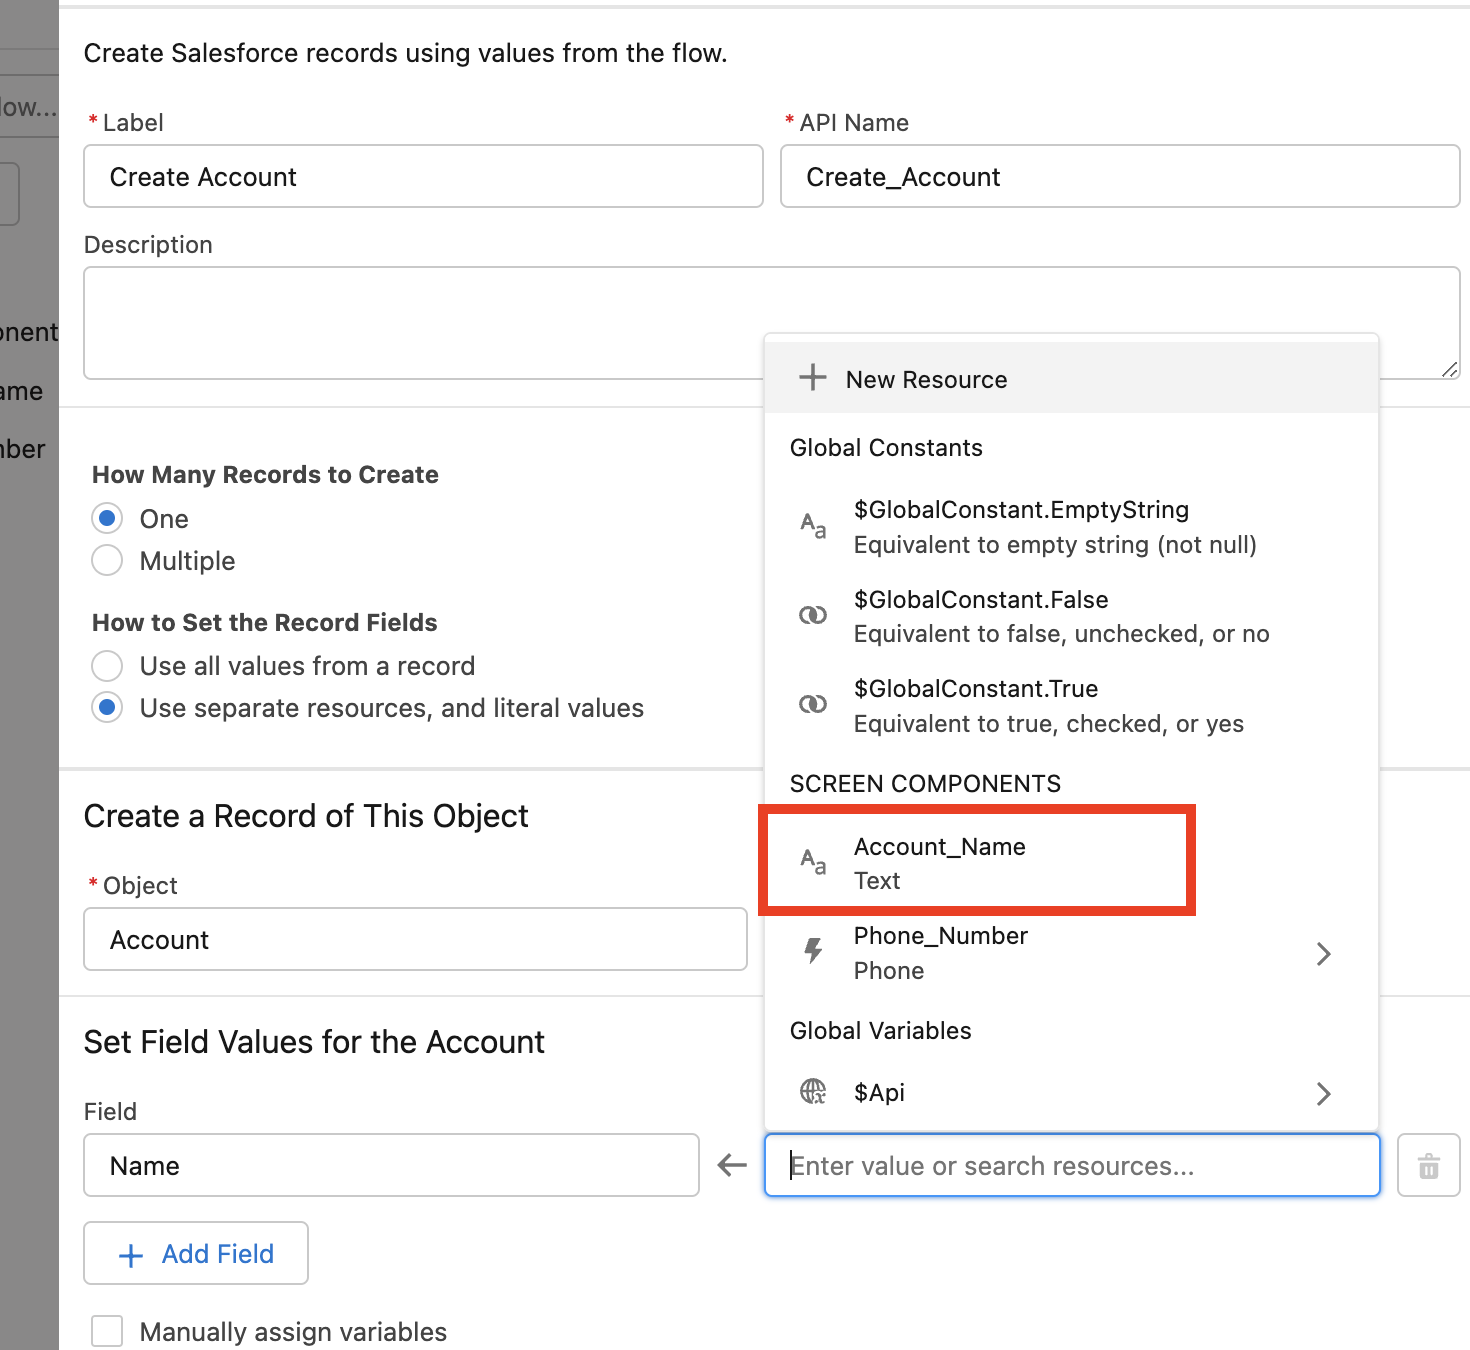
 In the Create a Record of this Object section, select “Account” for the Object and “Name” for the Field
- In the Value field, type in “Name” and select Account Name for the value under Screen Components
 Click Add Field choose “Phone” for the Field
- In the Value field, choose Phone_Number and then Value
- Click Done
If you want to add more elements you can continue to do so.
Step 5: Save Your Flow
- Once you have added all the elements you want to your flow, click Save.
- in the pop up window, name the Flow – “New Account” in this example
- Add a description as needed and click Save
You have now set up your flow.
 In future blogs, we will review how to distribute and activate your flow as well as add if to the Home Page to be accessed.
Please contact us at info@marksgroup.net for any Salesforce questions or support you need. Feel free to comment below. We’d love to hear your thoughts!
