If you repeatedly send the same outgoing messages such as requests, acknowledgments, or any type of form letter, you can create e-mail templates to simplify the process.
You can attach documents to the templates, insert Account/Contact field data, and use HTML formatting.
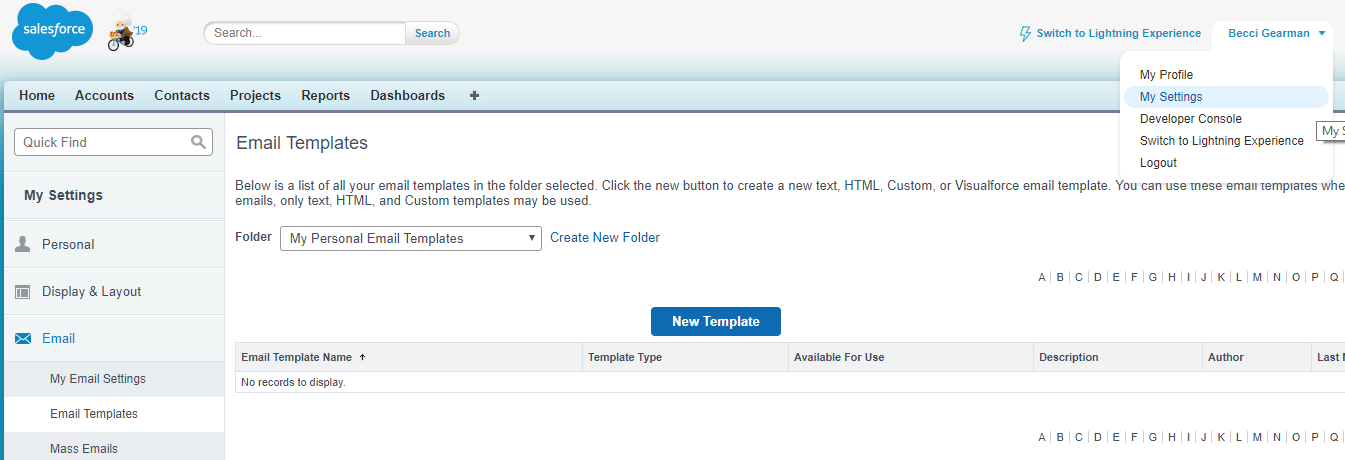
To Create Personal Templates:
- From the Username drop down in the right corner of the screen choose My Settings.
- Click on Email –>Email Templates.
- Select the My Personal Email Templates from the Folder drop-down list.
- Click the New Template
- Select the type of template you which to create:
- Text: Uses basic text-only with no formatting. Can be used for general alerts.
- HTML: You must have a Letterhead configured to use the type. You will add content to the letterhead and includes HTML formatting. You will need permissions to edit html templates.
- Visualforce: This uses an existing Visualforce page.
- Custom: This allows you freedom to copy existing HTML code into the template or build it from scratch using rich text formatting and functionality. You will need permissions to edit HTML templates.
For this example we will be using the Custom type.
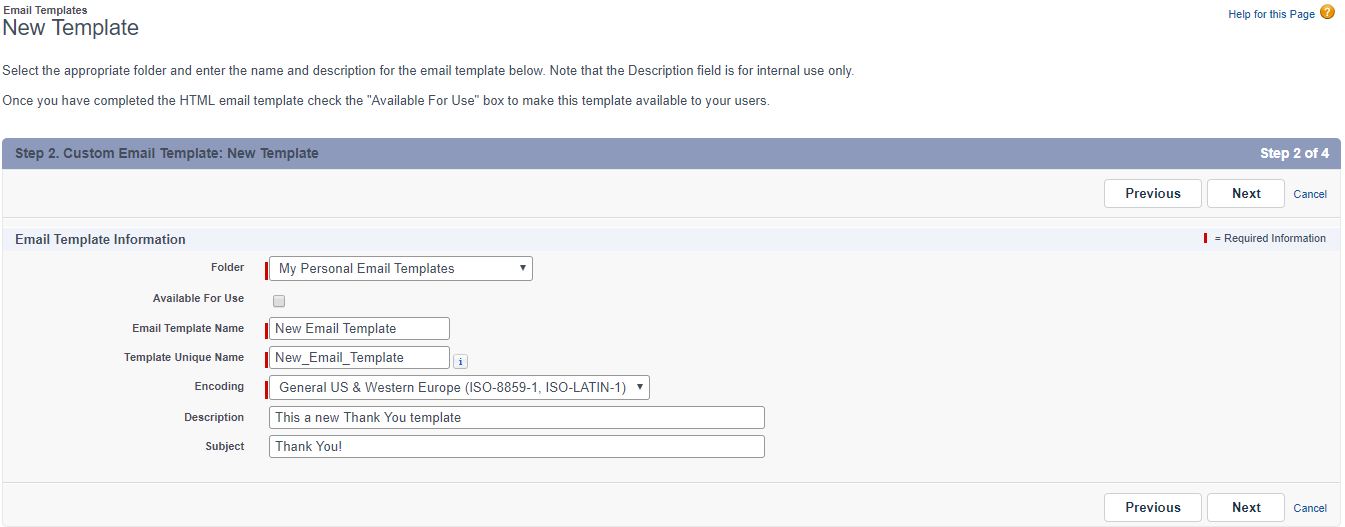
- Click Next.
- Choose the folder to store the template (e.g., My Personal Email Templates).
- Check the box to be Available for Use now or when you are ready to implement the template.
- Give the template an easily recognizable name. The Unique Name will automatically copy the name.
- Provide a Description of the template is desired.
- Enter the Subject of the outgoing message the template will be used for.
- Click
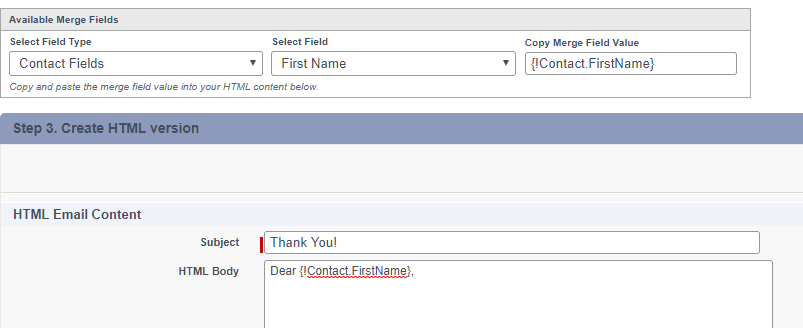
- Create the body of the template.
- To add available merge fields, select the type (e.g., Account, Contact) and then the field. The text needed will display in the Copy Merge Field Value box. Copy the text into the body when you want it located.
- To add spacing use <br></br> where you want a space.
- To add a new line use <div> and the front of the line and </div> at the end of the line.
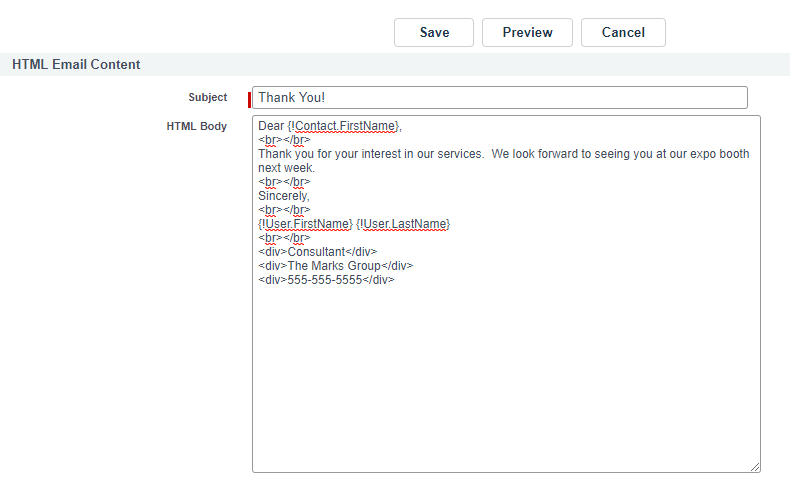
- You can use advanced HTML to create lists and formatting as well as hyperlinks.
- You can go into the template and edit at any time.
- Click the Preview button to view how the email template will look. A new browser will open. Make changes until it is what you want. The merge fields will not populate in the preview. We will test those later.
- Click Next.
- Click the Copy from HTML version Replace any merge fields with generalized text. Creating a text version of your HTML template allows the receiving party to see the email content even if their email client does not support HTML or rich text.
- Click Save. You can now edit the template Properties and any versions of the content (e.g., HTML, text).
- If you would like to add an attachment to the template, scroll to the bottom of the screen and click the Attach File The attachment will be included any time you send an outgoing message using the template.
Test Your Email Template:
- Click the Sent Test and Verify Merge Fields
- Choose a contact and/or account to test with. The field data from that record will be merged into the template.
- Check the box to Send email preview to: if you want to view the template as it will be delivered to the Inbox. Leave it blank and the HTML preview box will populate the fields.

