Let’s say you just created a personal view that you want to allow others to use–what do you do? Share it! Dynamics 365 makes this really easy. This is especially helpful for teams or collaborators that want to leverage.
Select the Advanced Find “funnel”. The view you’re going to share must be a Saved View. If you need to create a new view, play with the columns & filters:


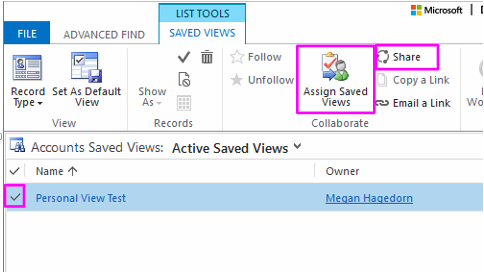
Select the Personal View you wish to Share, then Select Share. You can also assign a new owner to your saved views.
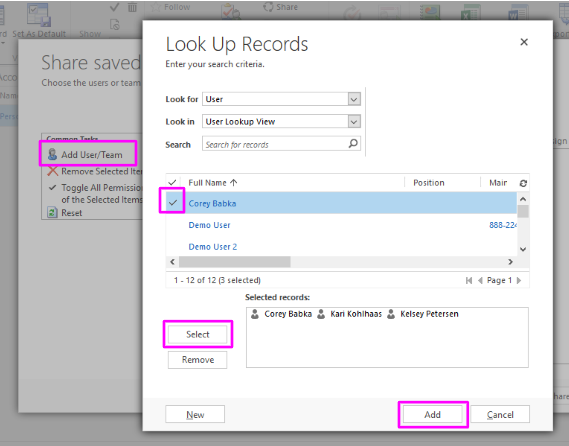
After selecting Share, select Add User/Team. Then, Search for or Select the Team or User you wish to share the view with. Hit Select to make them appear in the Selected Records box, then hit Add to confirm:
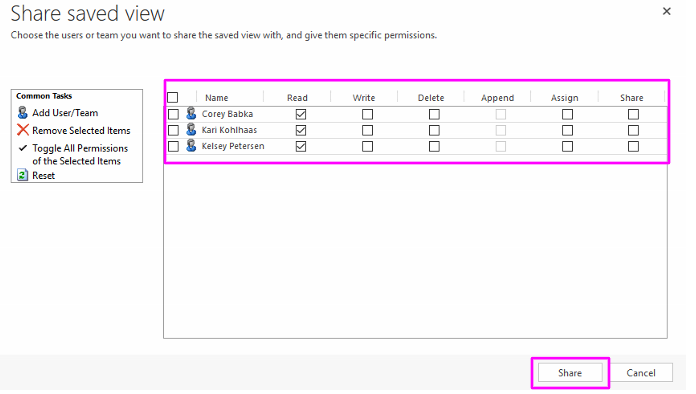
You can then manage each user’s permissions. They can Read, Write, Delete, Assign, and Share the Personal View. Click Share when you’re ready:
This walkthrough was completed using Firefox.
Let me know if you have any questions by commenting below or emailing me at megan@marksgroup.net.