When setting up Salesforce or any CRM, it is important to think of how to ensure that you are capturing data consistently for filtering and/or reporting purposes. Salesforce state and country picklists will help you with this.
What Are Salesforce State and Country Picklists?
State and country picklists are fields available in the shipping, billing , mailing and “other” address fields in various standard Salesforce objects. They help to ensure that all users are entering data the same way. The state and country picklists include 239 countries and territories.
How Do I Set Up State and Country Picklists?
The first step in setting up these fields is to configure the states, countries and territories that are needed for your specific organization.
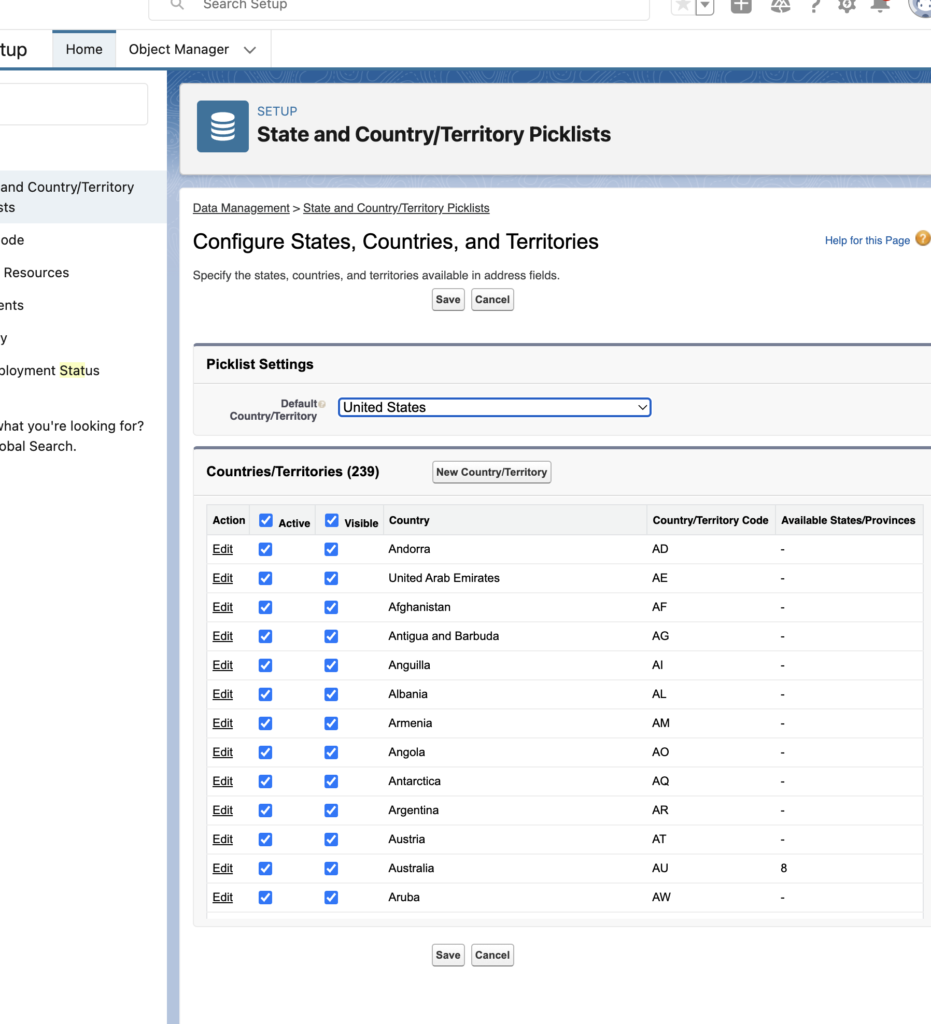
- Go to Setup and type “State and Country/Territory Picklists” in the Quick Find box.

- Click Configure States, Countries and Territories. For each country use the checkboxes to decide which Countries/Territories are active and/or visible. You can select or unselect all by using the checkboxes next to Active and Visible. Within each country you can click Edit to determine the specific states or provinces you want to include (or if you want them to be spelled out or initials). You can also set a default country/territory.ClickSave and Salesforce will tell you if you have been successful.
- Click 2. Scan for state and country territory/data in order to see which fields will be impacted by this change. Once the scan is complete, you will receive 2 emails with links to review detailed reports on where you may want to update some data and customizations. Once this is done, you will need to go in and convert your data.
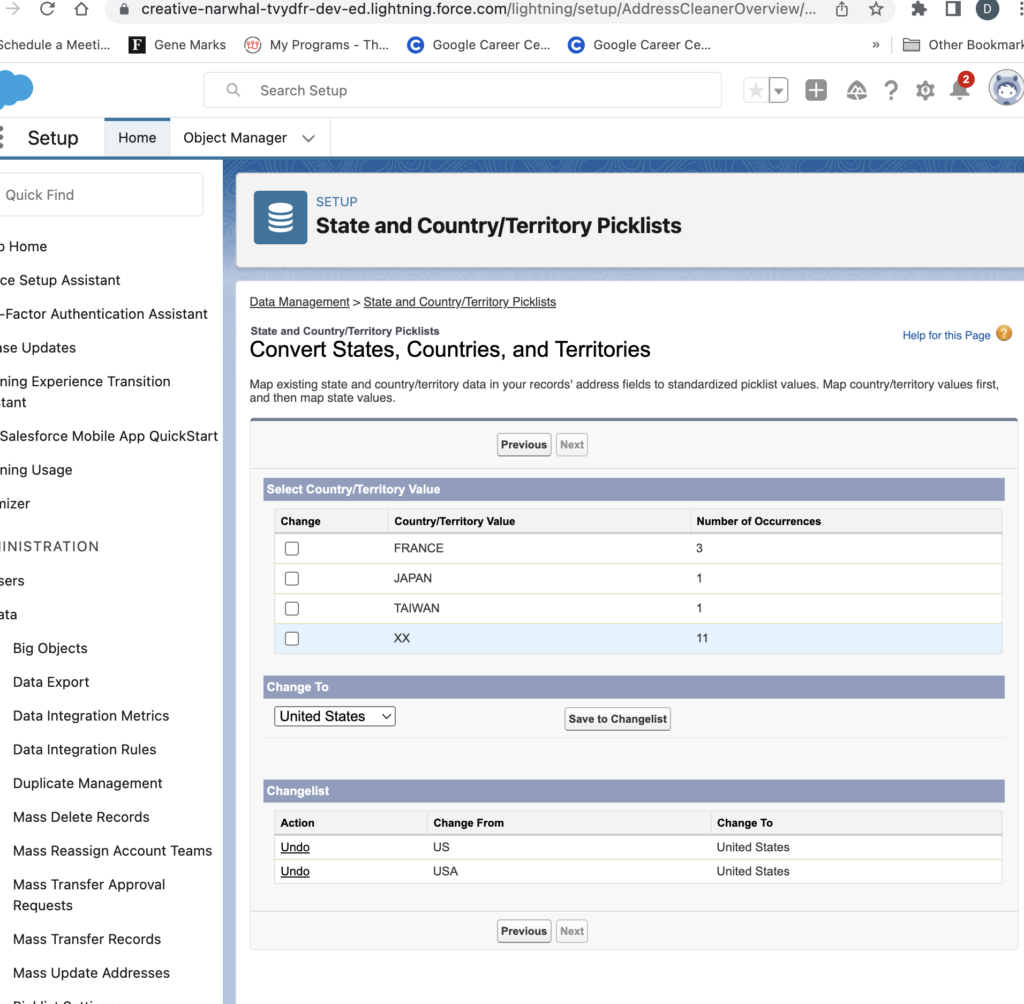
- Click State and Country/Territory Picklists and then choose 3. Convert identified data.
- You will then be able to review each Country first and determine if you want to change the value. For example, if you want USA to be US, check the change checkbox for USA and then indicate what you want to change the value to (these will be based on the values you chose in #2 above). Click Save to Changelist and repeat for any other values you want to change. If there are values for countries you did not initially include you can click Previous and add them to the State and Country Picklists. Once you have reviewed all values, click Next.
- Repeat the same process for all States and click Next.
- If you know you have no more changes, click Finish and Enable Picklists to complete the process. Otherwise click Finish and enable the picklists when you are ready. It may take some time for the picklists to be fully enabled and applied.
Once you are done, when you go to put customizations in place or you will want to use the picklist fields within the record layouts. In addition, the new picklists will be available for reports and dashboards.
Please contact us at info@marksgroup.net for any Salesforce questions or support you need. Feel free to comment below. We’d love to hear your thoughts!
