Although the administrator will set default items that are available on the Navigation bar, you can now change certain parts of each user’s page. You can add items to the navigation bar and rename or remove those items. The default items cannot be renamed or removed.
To make multiple changes to the Navigation Bar:
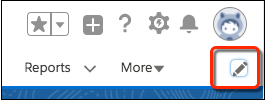
- Click the pencil at the far right of the Navigation bar
- Drag items on the Navigation Bar to reorder them
- Rename items by clicking the Pencil icon next to the item you want to rename. You can’t rename items that your admin has specified for the app.
- To remove items from your navigation bar, click the x next to the item. You can’t remove items that your admin has specified for the app.
- To add items to your navigation bar, click Add More Items. Search through your favorites or all available items in your org, and choose what to add. After you make your selections, you can reorder or remove items before saving your changes. You can’t rename or remove items that your admin has specified for the app.
To make a few changes in the Navigation Bar:
- Drag items on the Navigation Bar to reorder them
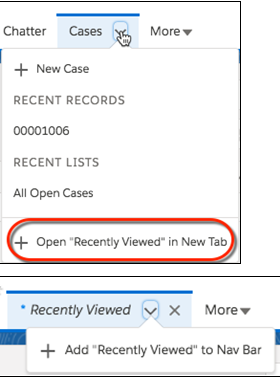
- If you’re viewing a page, such as a list or dashboard, and want to add it to the navigation bar, select Open in New Tab in the current tab’s dropdown menu to create a temporary tab. To permanently add the tab to the navigation bar, select Add to Nav Bar from the temporary tab’s dropdown menu.