Auto response rules can help set your relationship with a lead off on the right foot. They let your lead know you have received their submission (from a webform or somewhere else) and eliminates the fear that they have just fallen into a black hole.
When Should I Use Salesforce Auto Response Rules?
Auto response rules are important to put in place anytime you have a lead or contact submit something to you. This could be a “Request For Information” form on your website, a Help Desk submission or any other place a contact could be submitting information to you.
The benefit of an auto response rule is that it tells the lead or contact that you have received their submission and will get back to them soon. If your forms provides choices, you can customize your response based on the option(s) they select.
How Do I Create An Auto Response Rule?
1 – Go to Setup and type “auto-response” in the Quick Find window
2 – Choose the type of rule you want – Marketing (leads) or Service (cases). For our example here we will work with leads
3 – Click “New” to create a new rule and then name and save it
4 – Click “New” in the Rule Entries section so you can begin to start defining your rule.
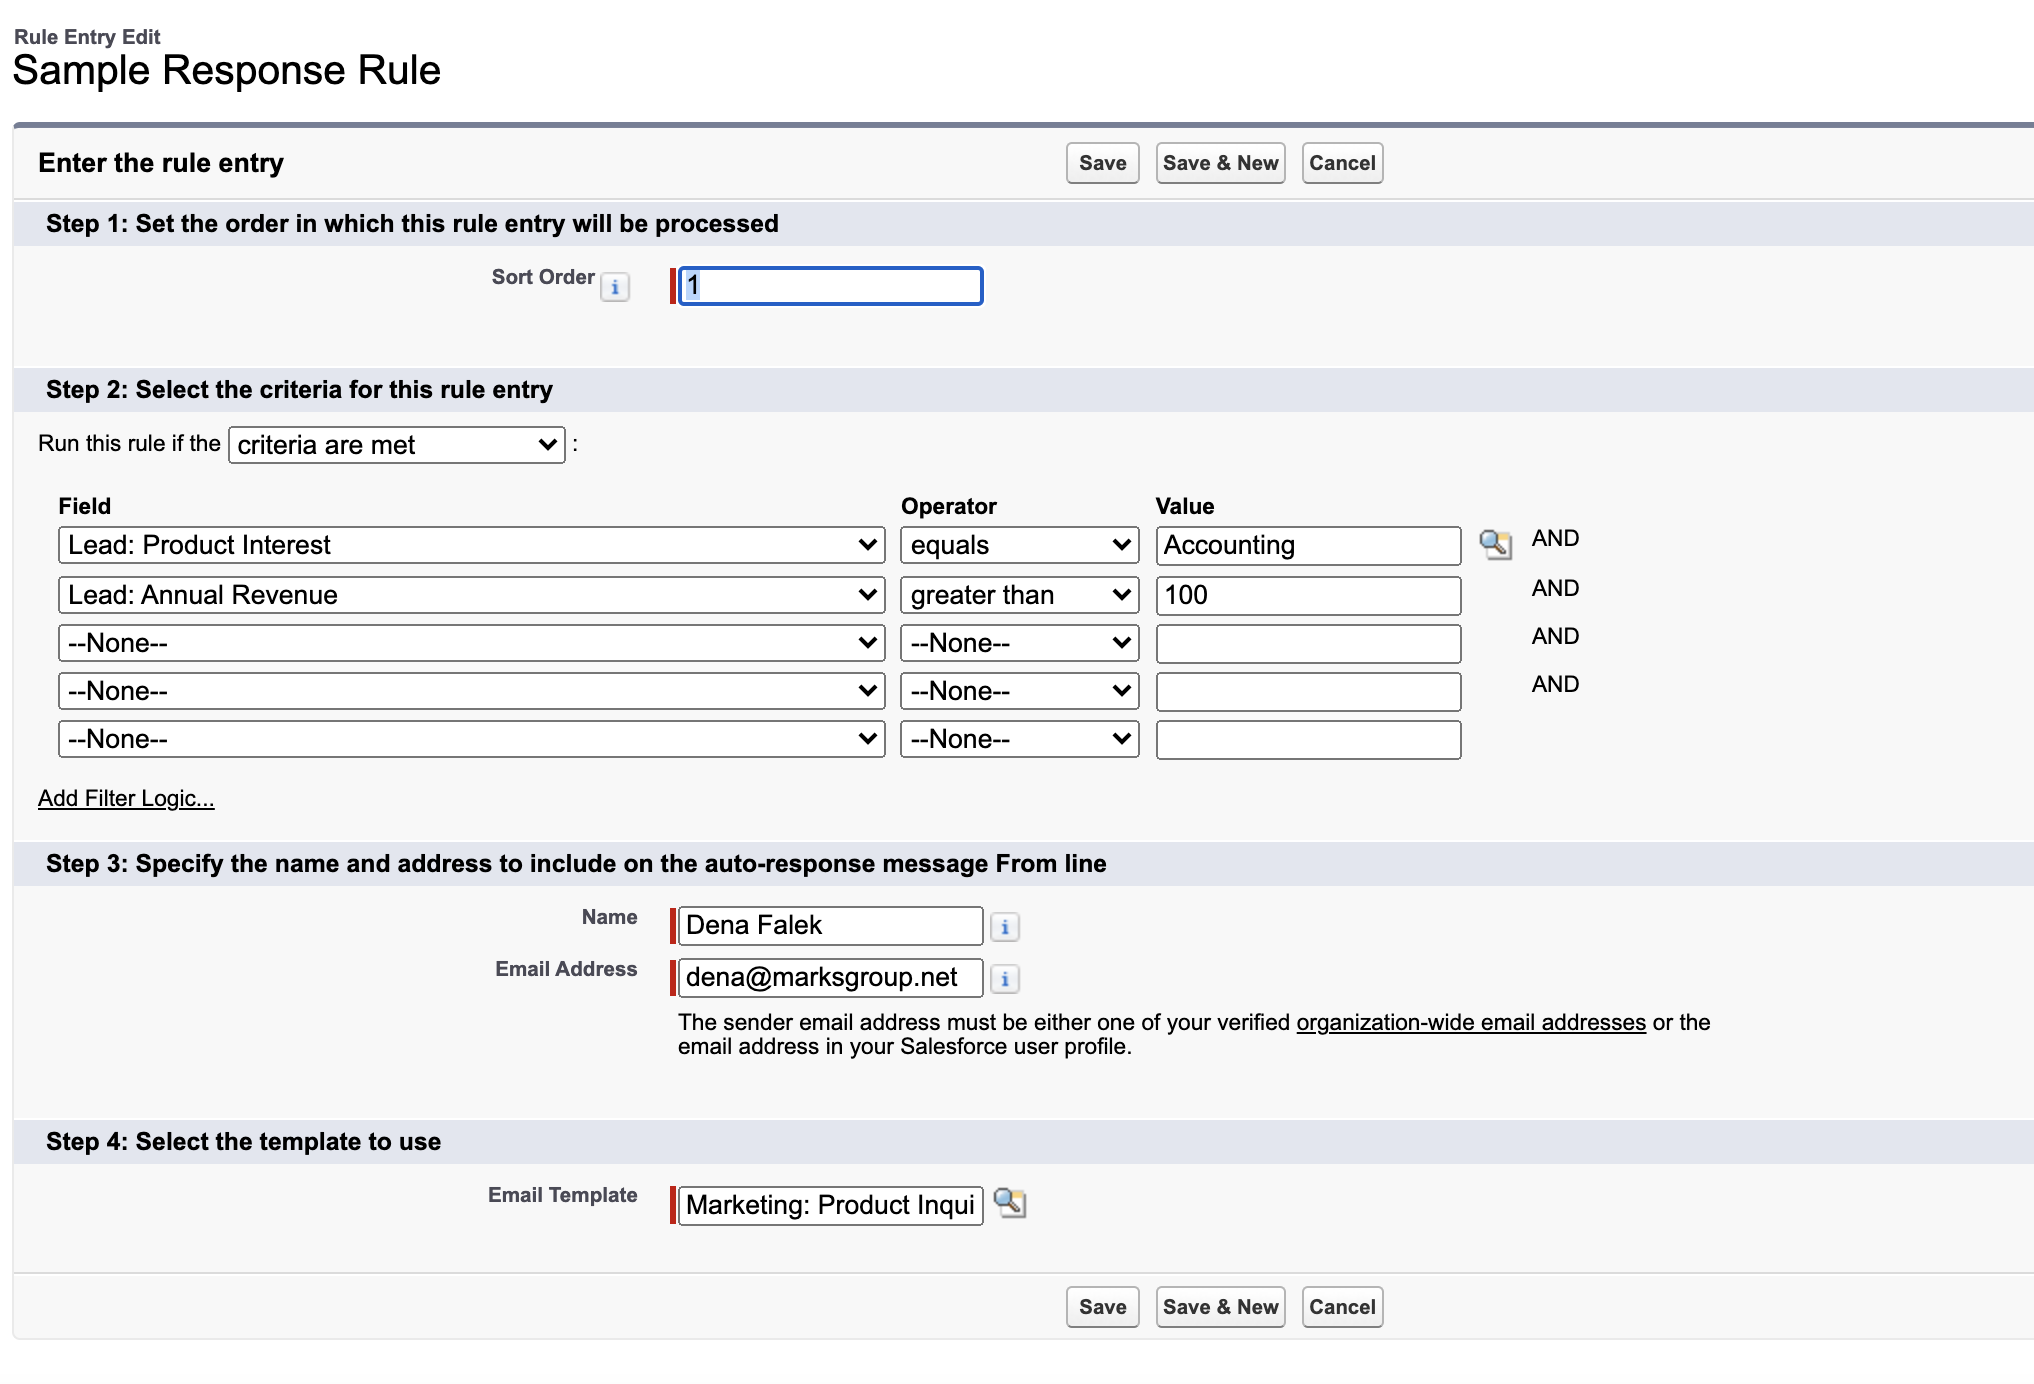
5 – Enter a number in the Sort Order box in Step 1 to indicate where in the process this rule should be considered. This will make more sense once you have more than one rule.
6 – In Step 2 you will start defining the criteria for your rule. You will need to decide whether the rule will run when the “criteria are met” or a “formula evaluates to true” and then you will define the criteria based on how certain fields are populated. The magnifying glass next to the Value box will show you the options you have made available for that field (depending on the type of field).
7 – In Step 3 you will specify the name and email address the email response will come from. This must be either a verified organization email or an email address in the user’s profile
8 – In Step 4 you will select the email template to be sent when the rule is met. Once this is done you can save your rule.
 Please contact us at info@marksgroup.net for any Salesforce questions or support you need. Feel free to comment below. We’d love to hear your thoughts!
