There are times when you send a mass mailing or other activity outside of GoldMine but would still like to have a history record attached to the records that participated. Some examples are if you sent holiday card or gifts, presentations, or any action done in mass that needs a history record.
To do this, create a simple automated process that can be configured and run when you need it. Then, each time you do a mass event, create a group or filter of the recipients to run the process for.
For this example, we will create history records for holiday gifts we sent to all clients.
Create a group or filter
- Select Tools | Filters.
- Create and save a new filter for “status field” = “Client”
Create Automated Process
- Select Tools | Automated Processes | Manage Processes. The Automated Processes Center will open.
- Change to an appropriate username.
- Click on the New Automated Processes button in the Toolbar to open the Automated Processes Wizard.
- Give it a name (e.g., Create History Record) and click Next.
- Select only the following three check boxes
- “Allow only one attachment of this process per contact”
- “Execute this process immediately upon attachment”
- “Allow users to attach this process”
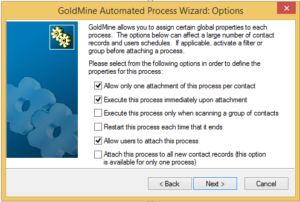
- Click Next.
- To create the event, click the New button.
- The Event Properties window comes up. There are three sections:
- Event Description: could say something like Create History Record.
- Trigger on: = Immediate.
- Perform Action: = Create History. Click the Options button.
- Activity Type = “Other”
- User = “Assigned User”
- Click the Activity Details button and fill out the Other action per normal. Include the reference, date, and a short note
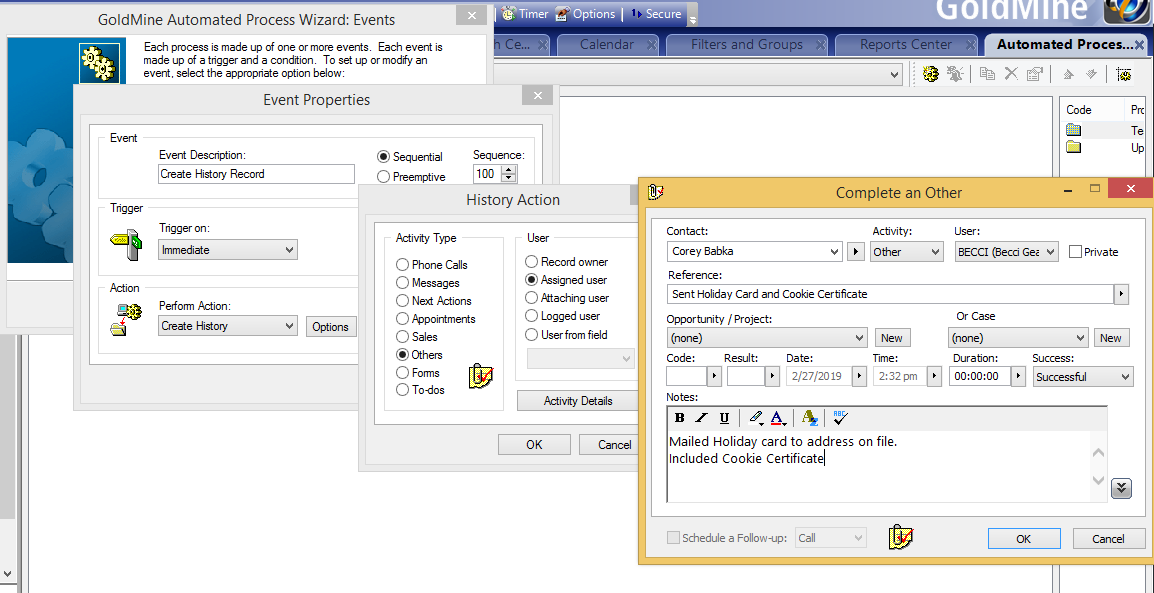
- Click OK three times.
- Click New and create a second event that triggers immediately to remove itself (called Remove Track).
- Click Next and Finish.
Attach and Run the Automated Process
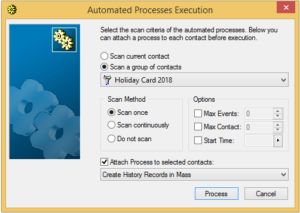
- Attach the AP to the filter/group by selecting Tools | Automated Processes | Execute Process.
- Select Scan a group of contacts and select the appropriate filter/group from the drop-down list.
- Select Scan once.
- Select Attach Track to selected contacts: and select the Create History Record AP from the drop-down list.
- Click Process.