Category

GoldMine CRM

GoldMine : Filtering Pending and History

By GoldMine CRM No Comments

Did you know that you can filter and sort your History and Pending tabs like you would an Excel sheet?

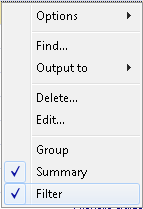
First thing is to enable filtering within the tab. Right click and make sure that “Filter” is checked.

Now, use the drop down column headers with the tab to filter and sort;

You can always tell there is a Filter enabled by looking at the bottom strip of the tab, like this;

Be aware! The filter will persist, even through a restart of GoldMine! To release the filter, you must click the “X” on the left of the Filter notification. And don’t forget about that super-cool right-click | Output To…

Try it!

GoldMine : Maximizing the Notes Field

By GoldMine CRM No Comments

Ah, Notes! The lifeblood of GoldMine. But did you know that you can make it even easier to enter in all those precious details? When you’re in the Complete or Schedule window, click the little button in the lower right hand corner (the one with the two “down arrows” on it).

And… presto! You get a larger window to write your notes in;

Keep in mind this doesn’t change the amount of Notes you can enter. It merely makes it easier to work inside the Notes area. Also, keep in mind that GoldMine notes accept rich text (HTML), so feel free to paste (almost) anything!

GoldMine : Commenting Picklist Items

By GoldMine CRM No Comments

Did you know that you can “comment” pick-list items to help your users select the correct entry? I see a lot of Goldmine installations with tons of “codes”, like this;

By adding a double slash (“//”),  you can provide friendly descriptions for each item. Anything after the slashes is ignored. So, our list of confusing codes can now look like this;

You can do this with any pick-list. It really comes in handy when training new users. Try it!

GoldMine : Setting Default Username

By GoldMine CRM No Comments

Does your GoldMine always come up with the wrong username? This can drive you crazy, but it’s easy enough to fix. You need to actually edit the properties of your Desktop shortcut;

  1. Right-click your GoldMine shortcut and select Properties.
  2. In the Target box, add the following text; /U:Username (where “Username” is your GoldMine username).
  3. Hit Apply and then Ok  your way out.

GoldMine will now come up with whatever name you typed for Username. For those of you using a “Pinned” GoldMine shortcut, you will need to Unpin and Re-pin the application to the taskbar.


GoldMine : Revoking Deletion Permissions

By GoldMine CRM No Comments

We had a client that not too long ago lost a contact record due to a mistaken deletion. It also just happened that their backups had also failed, so that record is now gone forever. Because of this, we always urge folks to use a “Deletion Strategy”.

Some common suggestions we have are;

  1. Remove everyone’s ability to delete contact records under Tools | Users Settings | Properties | Access.
  2. Only allow deletions to be made by a few (or one) veteran users.
  3. Create a field on the Contact Record specifically to mark records for future deletion (ensuring that an actual human being looks at the list before records are purged)
  4. Create a new “archive” database. Instead of deleting records outright, simply Move them into the Archive and out of production.

I guess the moral of the story is that by default, GoldMine allows any user to delete any Contact Record. I urge you to consider what kind of issues this could cause.

GoldMine : Setting Tab-Stops

By GoldMine CRM No Comments

Did you know that you can TAB around the fields on the Primary Contact record? It’s easy to forget that keystrokes used to be a “thing”; nowadays everyone begins by reaching for their mouse.

You can also customize the TAB-stop order in field properties.

To do this;

  1. Log into GoldMine as MASTER or equivalent.
  2. Right-click on a field label and select Properties.
  3. Go to the Layout tab.
  4. Change the Position in the lower right-hand corner and Ok your way out.

A few notes: Goldmine won’t magically change the Position number of the other fields, so you must edit this for all the fields on the contact record at the same time. I find it easiest to actually print out a screenshot of the contact record itself and mark it up with a pen, noting which field should be in which order. Then just go ahead to run through them all. It’s not as bad as it sounds.

Have fun!

GoldMine : Creating Resources as Users

By GoldMine CRM No Comments

Ever wanted to schedule a Conference Room or Service Truck on the Calendar in GoldMine? Simply create a new user. GoldMine allows you to create a infinite number of users, so this doesn’t affect licensing.

  1. From the top-level menu in GoldMine, select Tools | Users Settings. (You must have MASTER rights to do this)
  2. Click the “New” button to get started.
  3. Give the username a simple, descriptive value (i.e. TRUCK1 or CONF5) .
  4. Make sure to make a password for this account, otherwise anyone would be able to login with it.
  5. Ok your way out.

Now, when viewing the calendar, you can schedule TRUCK1 or CONF5 as a user. This will prevent double-booking of the same resource.

GoldMine : Changing the Calendar Time Increment

By GoldMine CRM No Comments

Did you know that you can change the time increment on the graphical calendar? Think of it as changing the calendar resolution. That way, when you click-drag items onto the calendar, you have more control over the duration. This can be especially useful for those who are scheduling a lot of Phone Calls.

  1. From the Goldmine top-level menu, select Tools | Options | Calendar.
  2. Change the “Increment Time By” setting to your desired interval.

I typically see this set to 15 or 30 minutes. Have fun!


GoldMine : Automatically Alarm Activities

By GoldMine CRM No Comments

Did you know that you can set GoldMine to auto-alarm on a per-activity-type basis? This has actually always been available, but “back in the day” we had to edit an INI file to get this working.

Now it’s much easier;

  1. From the GoldMine top level menu, select Tools | Options | Alarms | More Options.
  2. Simply check the box each to next Activity Type you’d like to have automatically alarmed.

Pro Tip : Don’t give in to the desire to alarm EVERYTHING. Alarming everything just makes alarms useless.

GoldMine : Requiring Input

By GoldMine CRM No Comments

When customizing your GoldMine record layout, you can make any field “required”. This means that the user will not be able to navigate away from the Contact Record until the field has been filled.

To do this;

1. Enter Customization Mode by right-clicking on the Contact Record and selecting “Screen Design”.
2. Find and right-click on the field you’d like to make Required.
3. Select “Properties”.
4. Go to the “Security” Tab.
5. Check the box which says “Required Data Entry”.

“Ok” your way back out. Users may need to restart their GoldMine to get the new changes.

Skip to content