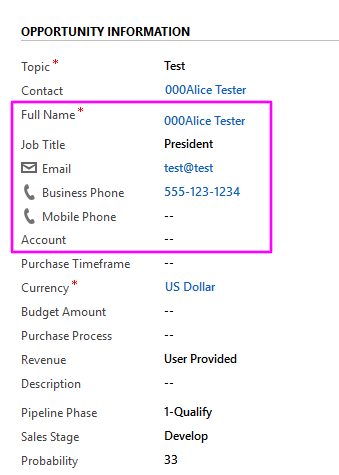
Quick View forms are a great way to display information from a different entity on a form, without the need of a Subgrid. The problem with Quick View Forms, however, is the amount of white space around them:
It’s possible to hide this white space. Note that this solution is unsupported by Microsoft, and we’ll be referencing this great blog post for the script to be used, though I’ve made a few tweaks to get it working.
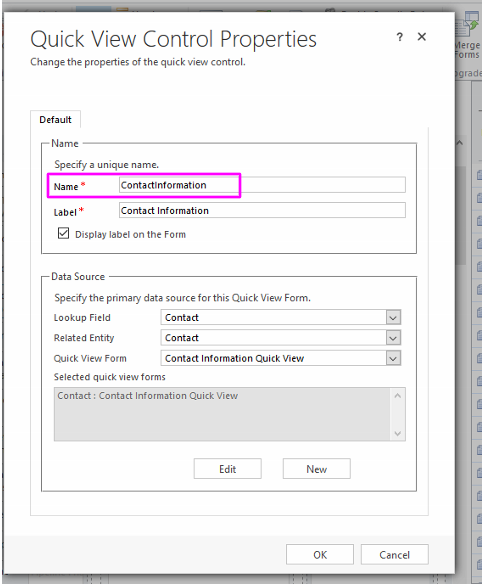
Note the Quick View Form you want to hide the white space for and jot down the system name (which can be found in the Quick View Form properties on the Form it resides on):
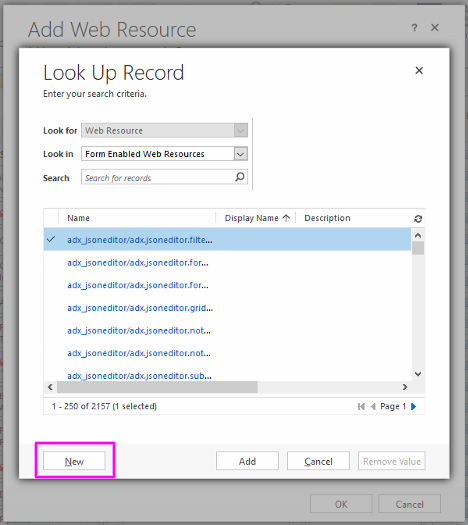
Next, we must create two new Web Resources. This can be done from any form (Insert->Web Resources -> New):
This first Web Resource is for CSS that will remove the white space. The second Web Resource is for the Javascript that calls the first Web Resource.
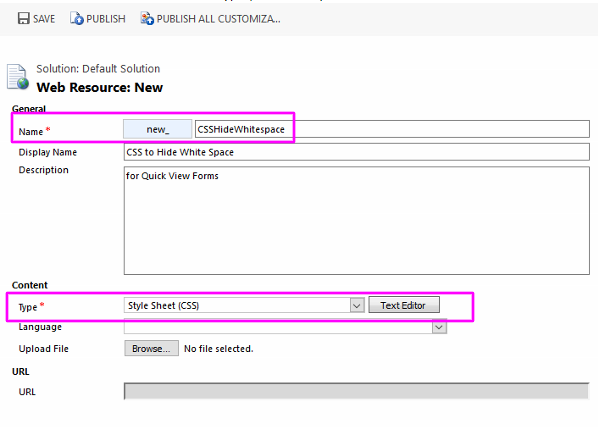
Give the Web Resource a name and Type (choose CSS):
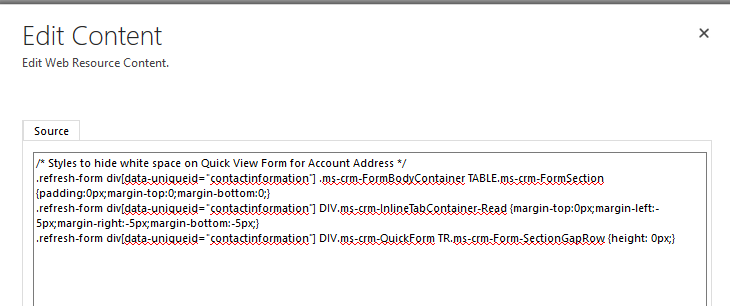
Click Text Editor next to Style Sheet (CSS) and include the below code. Where it says “CHANGETHIS”, change the text (keep the quotes!) to the name of the Quick View Form you want to update:
/* Styles to hide white space on Quick View Form for Account Address */
.refresh-form div[data-uniqueid=”CHANGETHIS”] .ms-crm-FormBodyContainer TABLE.ms-crm-FormSection {padding:0px;margin-top:0;margin-bottom:0;}
.refresh-form div[data-uniqueid=”CHANGETHIS”] DIV.ms-crm-InlineTabContainer-Read {margin-top:0px;margin-left:-5px;margin-right:-5px;margin-bottom:-5px;}
.refresh-form div[data-uniqueid=”CHANGETHIS”] DIV.ms-crm-QuickForm TR.ms-crm-Form-SectionGapRow {height: 0px;}
Save the first Web Resource.
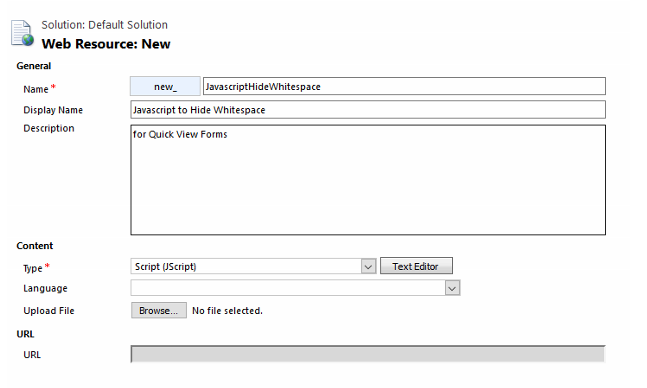
Create a second Web Resource (Javascript this time):
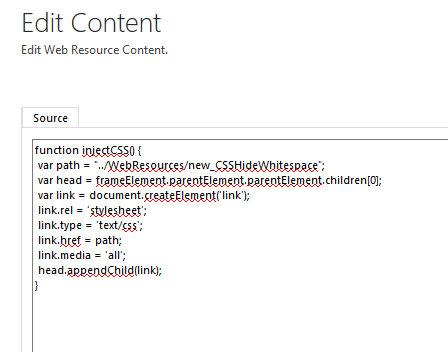
Copy the following script in the “Text Editor” of this Web Resource, updating “CHANGETHIS” to the name of the CSS Web Resource you created first–don’t forget the new_ prefix!!:
function injectCSS() {
var path = “../WebResources/CHANGETHIS”;
var head = frameElement.parentElement.parentElement.children[0];
var link = document.createElement(‘link’);
link.rel = ‘stylesheet’;
link.type = ‘text/css’;
link.href = path;
link.media = ‘all’;
head.appendChild(link);
}
Save and close the Web Resources.
Back in the Form, click “Form Properties”:
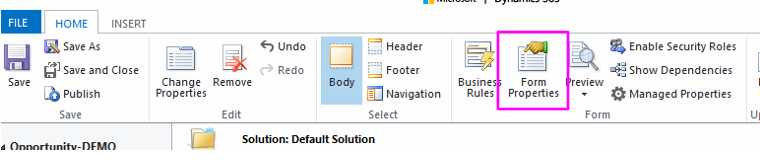
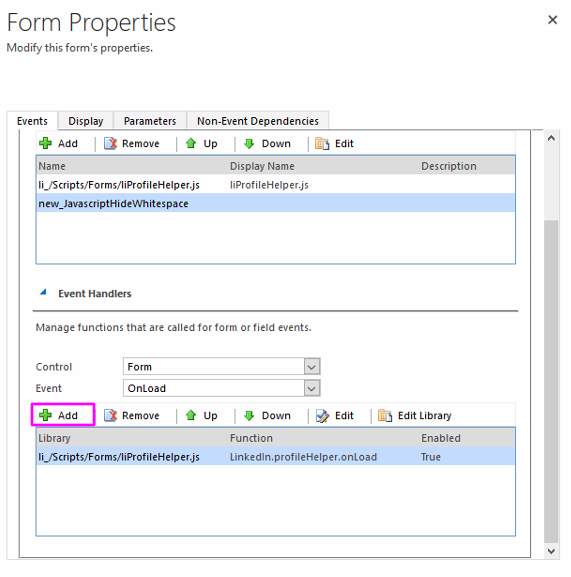
Click Add Form Library:
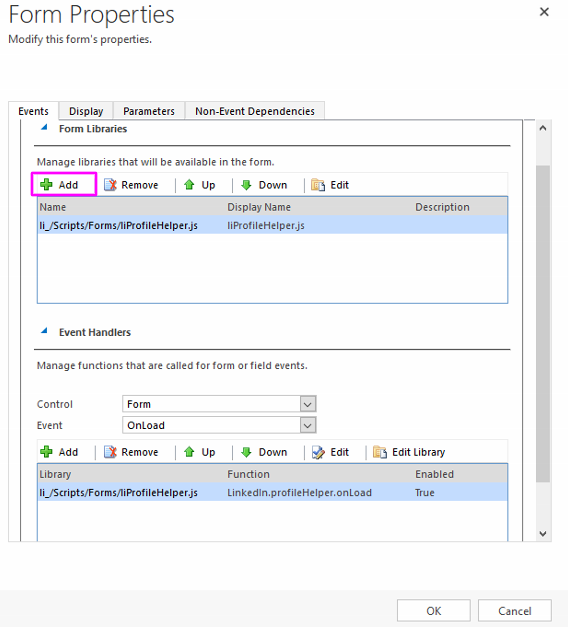
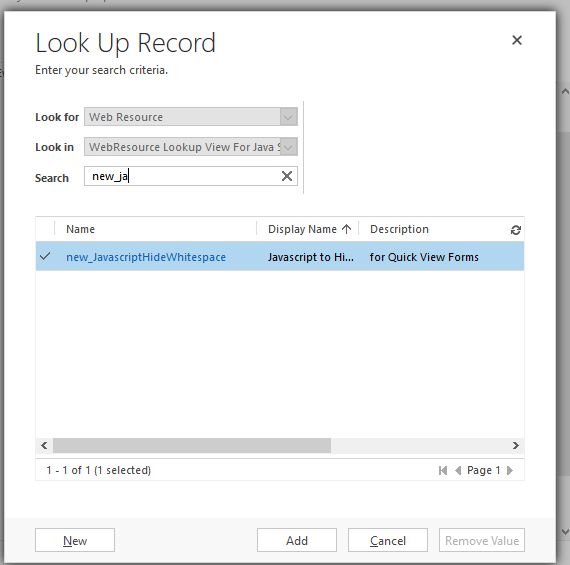
Add the new Javascript Web Resource you just created:
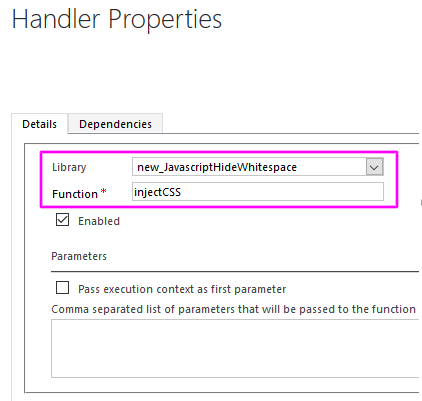
Click Add New Event Handler next, ensuring OnLoad is selected for Event:
Change the Library to the correct Web Resource, then put injectCSS for the function name per the code we used earlier. If you wanted to use a different Function Name, you would need to also update the function name in the Javascript Web Resource:
Click OK, save, and publish.
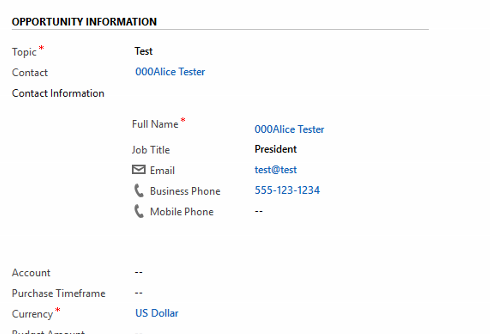
Your Quick View Form should take up much less space!