There have been enough changes to how to manage Zoho CRM Imports that is time to offer a primer. Read on for tips on importing records into Zoho CRM.
Getting Your Files Ready For A Zoho CRM Import
The first step when importing files into Zoho CRM is to make sure you have correctly prepared your file. Here are some tips:
- You will need to prepare a file separately for each Zoho CRM module. Each column in the file will represent a field in a record within the module.
- The number of records you are importing will determine if the file type. If you have under 5000 records you can use an .xls, .slsx, .vcf or .csv file. If you have more than 5000 records, you will need to use a .csv file
- Although you don’t have to match your column headings exactly to the field names, this can help you keep track of the data and can make auto-mapping more accurate
Steps For a Zoho CRM Import
We will use the Contacts module for our explanation.
1 – When you are in the Contacts module, click the down arrow next to the Import Contacts button and choose Import Contacts. 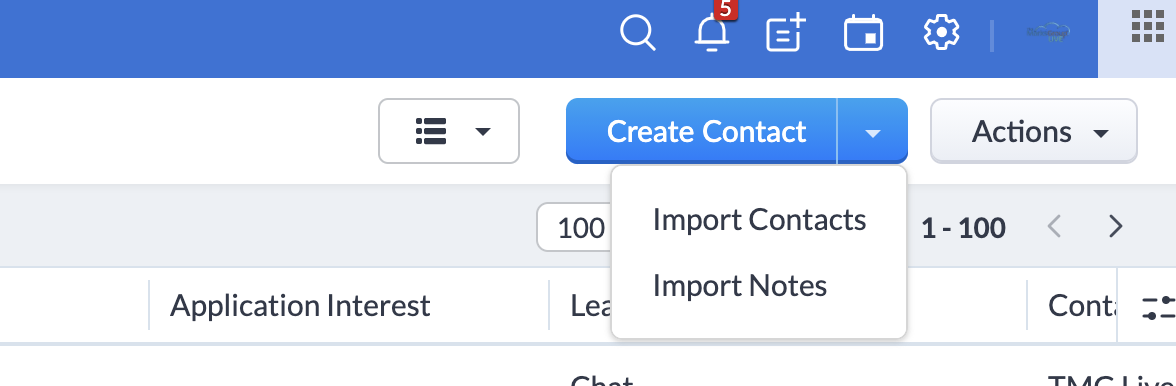
2 – In the next screen, you can either browse your computer of the file or drag it into the From File box. Once the file is successfully load, click Next
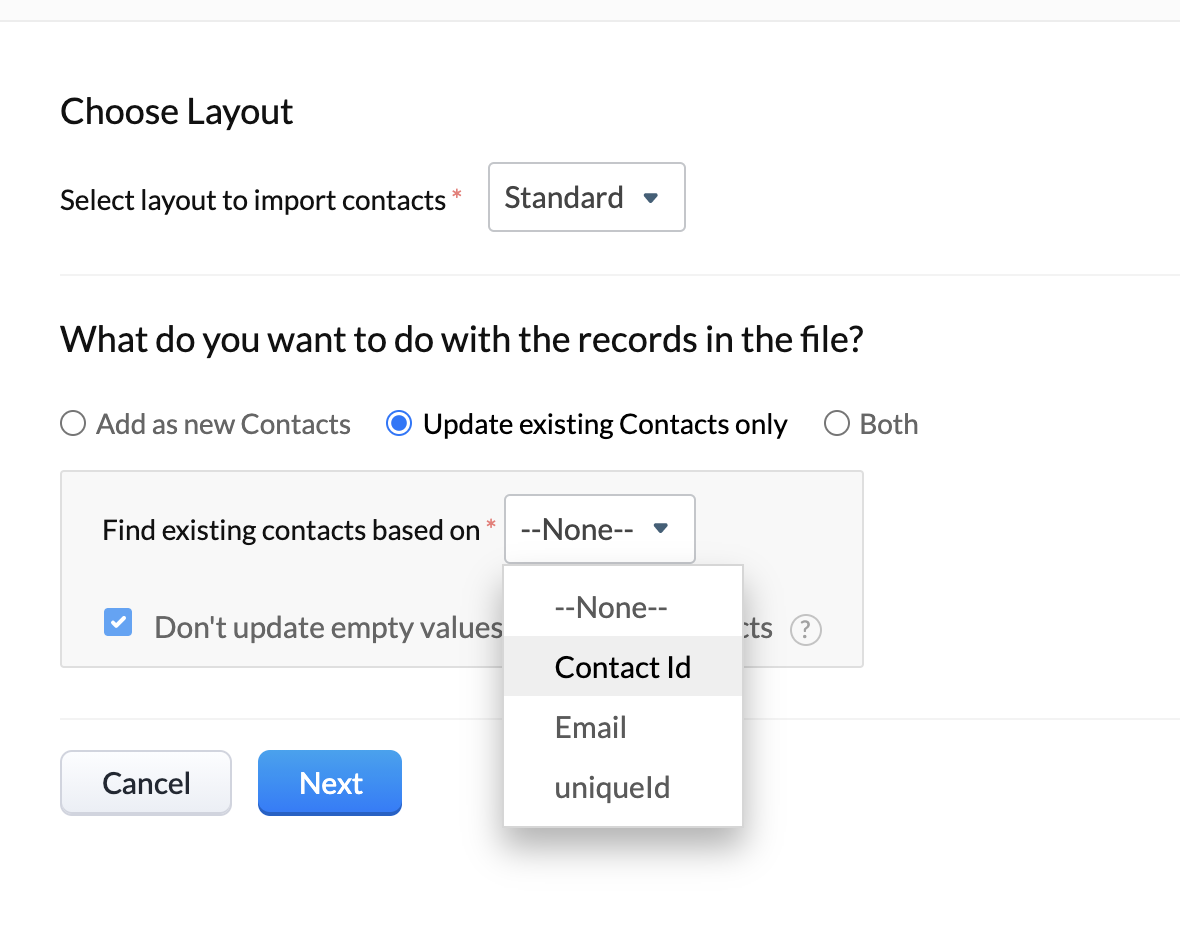
3 – Next, if you have multiple layouts you will have to choose which one you are importing to. In addition, you will need to select if you are adding new contacts, updating existing contacts or both. For any existing contacts, you will need to decide which field should be used to match the file to existing records. Contact Id (or whichever module you are in) will always be an option and you can get this Ib by pulling a report of your records and matching it through a vlookup or some other means. In addition, Zoho will give you the option of selecting any other unique field to match the records to. Once you select the field you want to use, click Next.
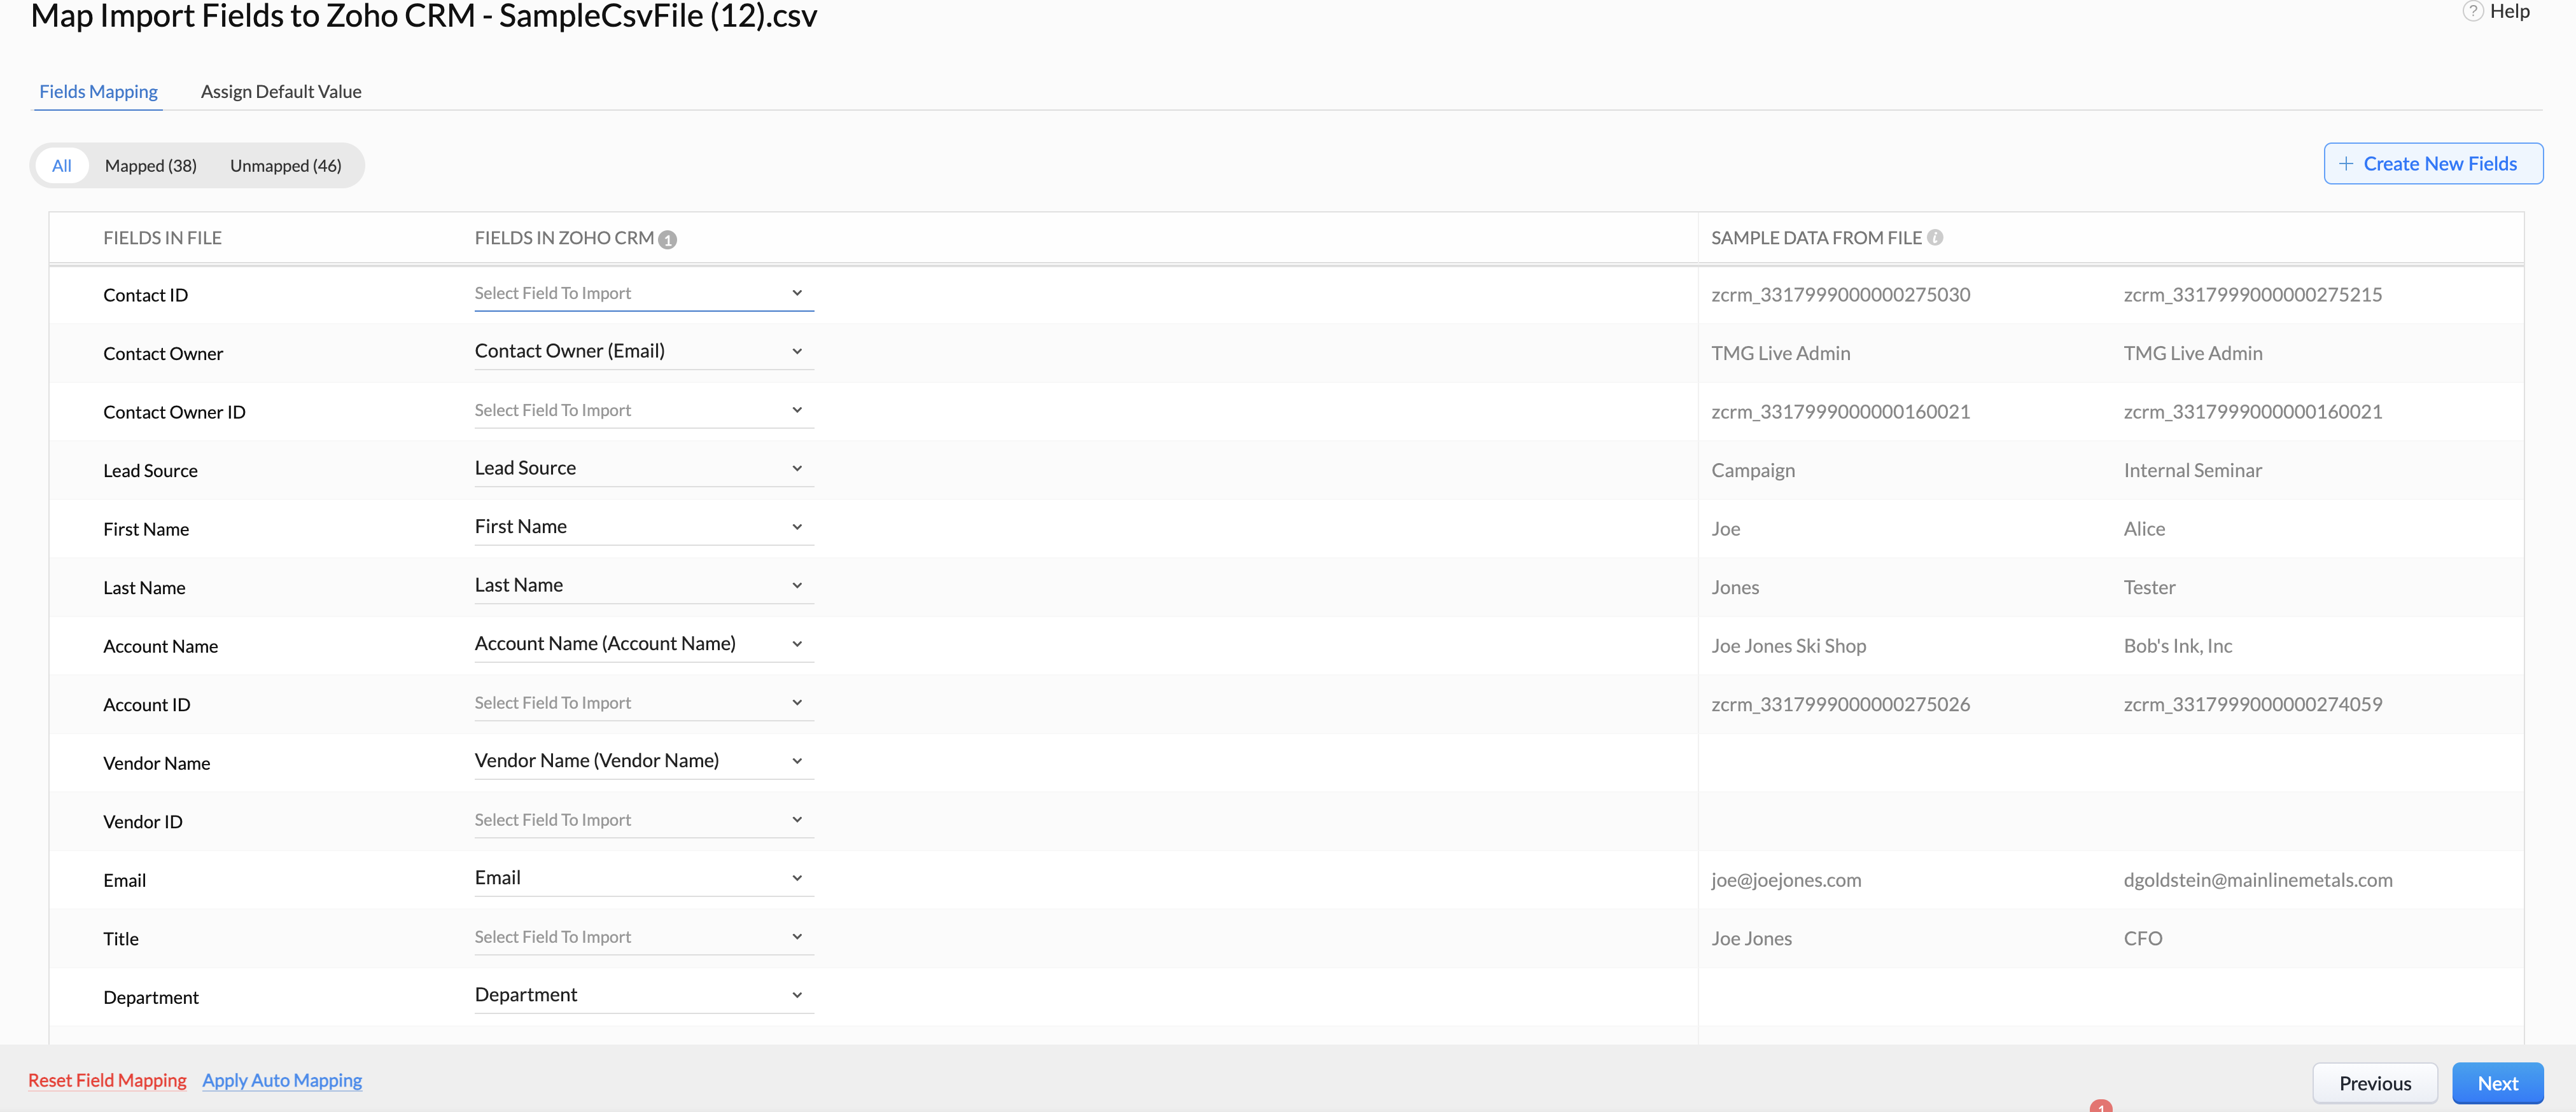
 4 – The next step involves field mapping. At the bottom you can apply auto mapping and Zoho will do it’s best to map the fields for you. After that, you can review the unmapped fields and assign a Zoho CRM field that most makes sense (if you haven’t matched the names exactly). Zoho will require you to have the data in a format that matches the field type. A convenient feature here is that you can create new fields during the import by clicking the Create New Fields button. Once you have mapped your fields, click Next. Zoho will give you two possible warnings: a)a warning if you have not mapped all fields but you can click Yes Continue or 2)a warning if you have not mapped a required field (indicated in the Zoho field list by an asterisk). After this you can move to the next step.
 5 – The next screen will give you an option to trigger any automations or processes you have set up. This is a new feature and will save a few steps users need in the past. This will be limited to files less than 10,000 rows. In addition, once the records are imported, the automations may still take some time to be completed. Whether you check the box to trigger automations or not, you will need to click Finish to process the import.
Once the import is complete, you will get a pop-up notification.
Did you know The Marks Group is offering Zoho CRM Admin training? Check out our Events page to sign up! Also, don’t forget to check out our Zoho Training Video library on our YouTube channel for more assistance with Zoho CRM and many other Zoho products! Feel free to contact us at info@marksgroup.net with any questions or if you need Zoho support. Feel free to comment below. We’d love to hear your thoughts!