We all need ways to interact with our clients, should it be via a website, client portal, email, and phone. Having a form integrated with your website is an optimal way to generate new leads and keep your existing customers engaged. With so many options out there it can be overwhelming, especially where cost is a concern! Zoho Forms is a great app and comes included with Zoho One. But what if you only have CRM and don’t want to purchase Forms on top of that? Fortunately, our friends at Zoho thought about that and Zoho CRM webforms let you build webforms inside Zoho and made it seamless to funnel that information right into your records!
Where do I access a Zoho CRM Webform?
To access Zoho CRM webforms, navigate to Setup > Developer Space > Webforms. Here you can create forms and auto-responders, set up A/B testing, and view your form analytics. Let’s start at the beginning: creating a form.
Creating a Zoho CRM Webform
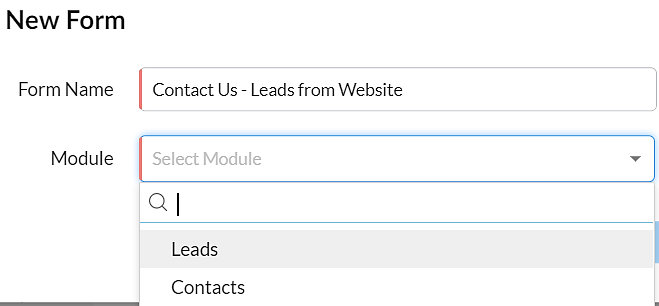
Step 1 – From the webform page in setup, click on New Form in the center bottom if this is your first form. Otherwise the button will be in the top right. Give your form a name and choose the module where you want your records created.
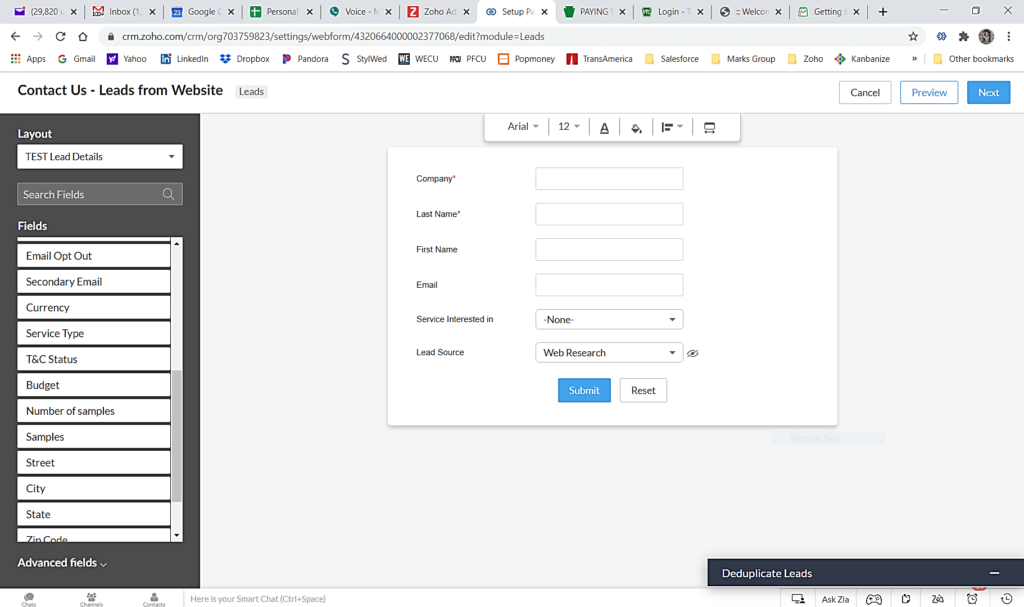
Step 2 – Choose the module layout the information will be input to, and simply drag and drop the fields from the left side panel to your form builder. Note that only fields that exist in the chosen layout can be selected. Use the editing toolbar at the top to add some design touches to your form. Hovering over a field, you will see a gear icon that allows you to set a field as required, hidden with a pre-set value, and add help text. You can even change the display values in the buttons at the bottom of the form. In this example, everyone who fills out my Contact Us form on my website will come in as a lead, along with the service they are interested in, and by default all leads added through this form will indicate the lead source as Web Research.
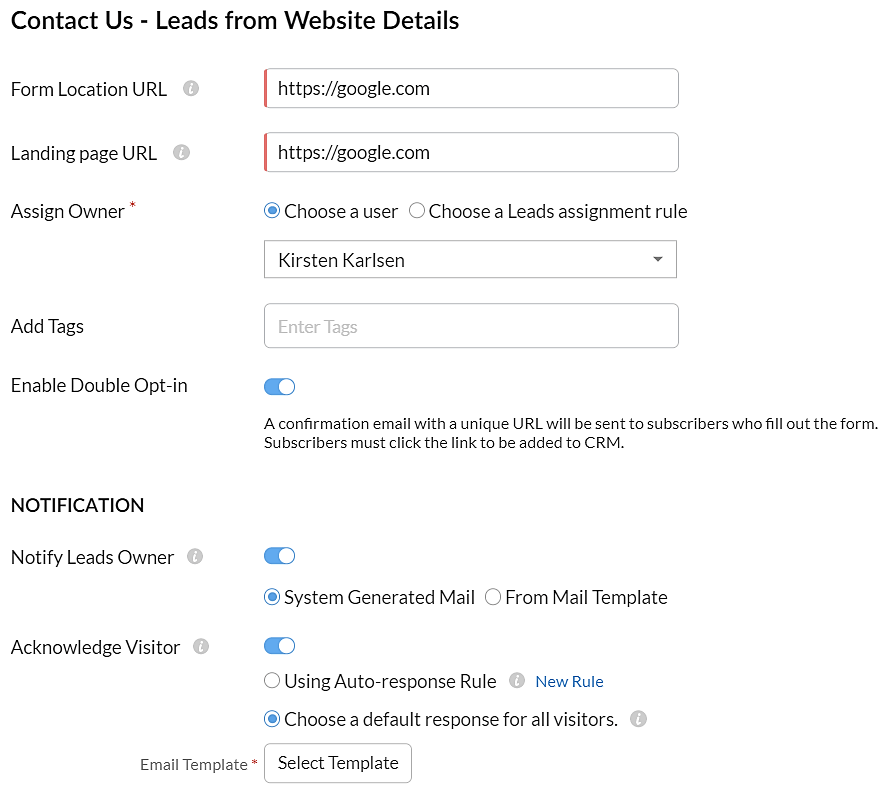
Step 3 – Click next to continue. In the Dialogue box you will be asked for the URL in order to both place the form and redirect the user once the form is submitted. You must enter values into these fields but can edit them prior to publishing if you are unsure of the destination. You’ll also be asked to either name a user or use an assignment rule to designate the record owner, and be given various other options, such as adding tags, notifying record owners, acknowledging visitors, etc.
 Step 4 – Finally, choose your appropriate code format, copy the code, and drop it right into your website!
Once your form is up and running, you will be able to access the analytics associated with clicks, submissions, lead conversion, and more. You can even create variations of the same form and use analytics to determine which form drives better results!
Stay tuned for more next time. And don’t forget to check out our Zoho Training Video library on our YouTube channel for more assistance with Zoho CRM and many other Zoho products! Feel free to contact us at info@marksgroup.net with any questions or if you need Zoho support. Feel free to comment below. We’d love to hear your thoughts!