The document inspector wizard in Office 365 can help ensure your document is clean of hidden properties, personal information, and other items that could cause issues before you send or publish it (think macros or custom XML data). This is available in Excel, Word, and Powerpoint. To learn how to inspect a document, workbook, or presentation, keep reading!
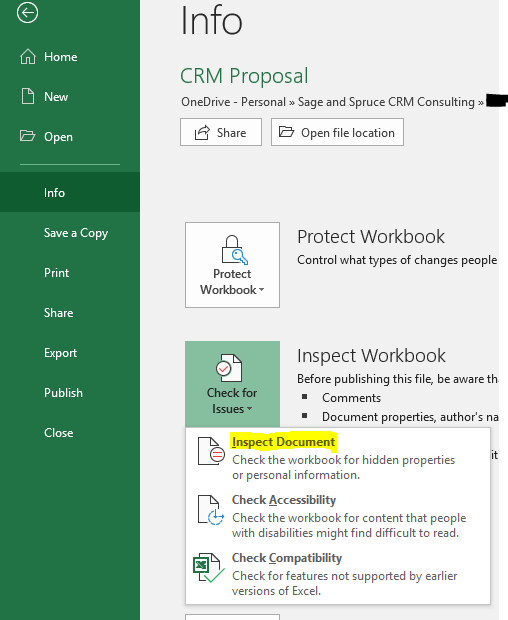
Open a document and select “File”, then the “Info” tab.
Select the “Check for Issues” tile, then “Inspect Document”:
A pop-up window will confirm this action and ask you to save the file.
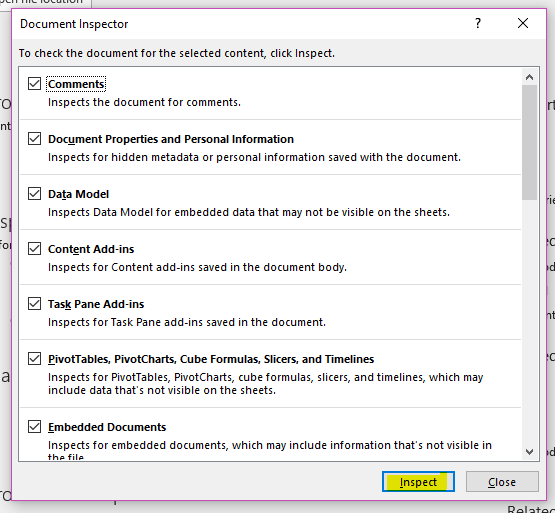
The Document Inspector window will appear, allowing you to select the types of content you want to search for. Select “Inspect” when ready:
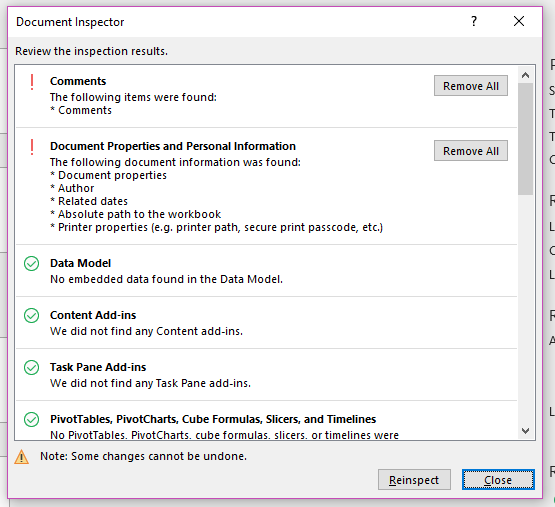
The results will appear immediately in the same window detailing what was found. You also have the option to remove the issues it finds (eg. removing all comments, removing author information, etc):
Please note that the types of content the document inspector searches for will vary depending on the program you’re running it from.