Salesforce validation rules allow you to set criteria when users perform and action. This is in ensuring data and process quality among your Salesforce users.
What Are Salesforce Validation Rules?
Salesforce validation rules allow you to set a true/false condition that will generate a custom error message when a user enters data that goes against your policies. If the rule evaluates to true, the action will be performed. If the rule evaluates to false the error will display. The user can make corrections based on the error message and try the action again.
Here are a few examples:
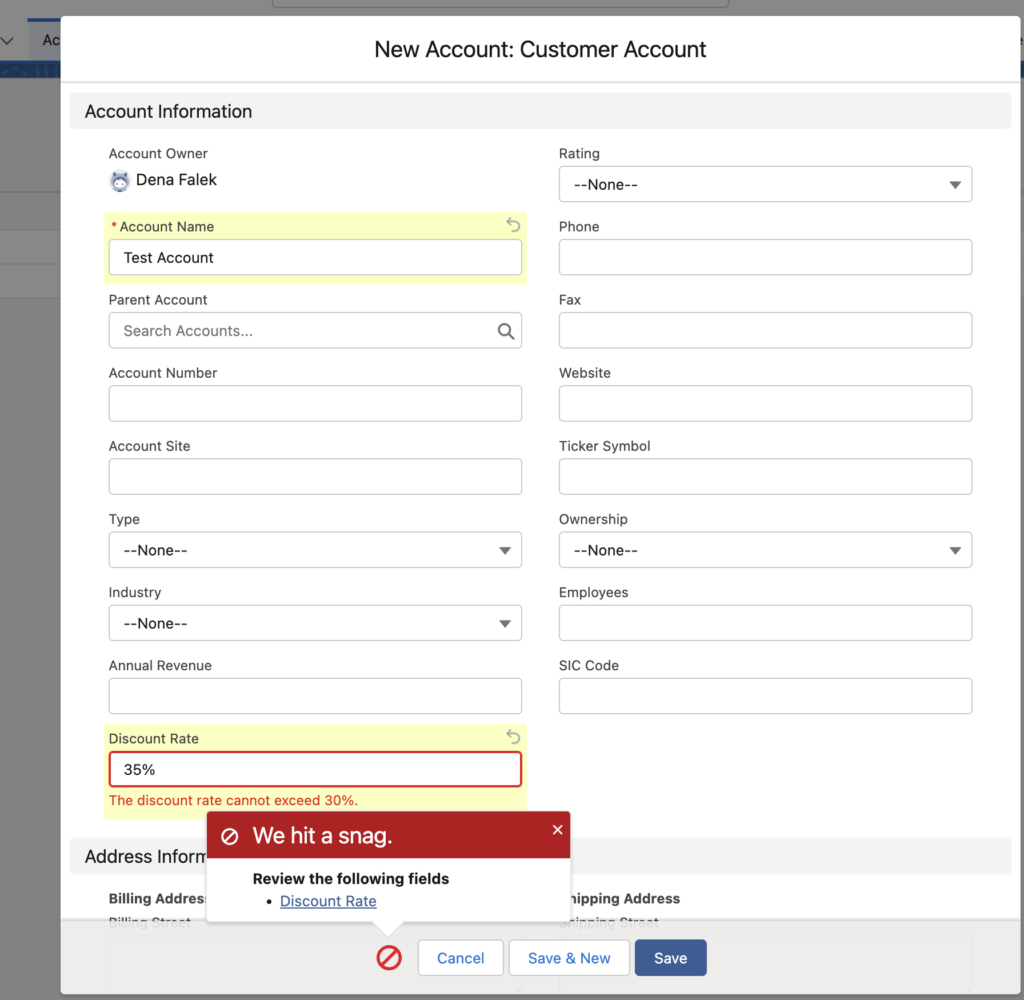
- Accounts cannot have a value in the Discount field over 30%. If the user enters a value over 30%, they would be notified via the error and can change the discount amount and save the record.
- Only specific users can update the Active field in an Account record. If someone other than those users tries to update the field, an error will display to notify the approved users to make the change.
How Do I Create A Validation Rule?
We will use the first example above to show you how to create a validation rule.
- Click the Setup icon (Gear) and choose Setup.
- Click on Object Manager and select the object you want to add the validation rule to. For this example we are choosing the Account.
- Choose Validation Rules from the menu on the left (at the bottom).
- Click the New button in the top right of the screen.
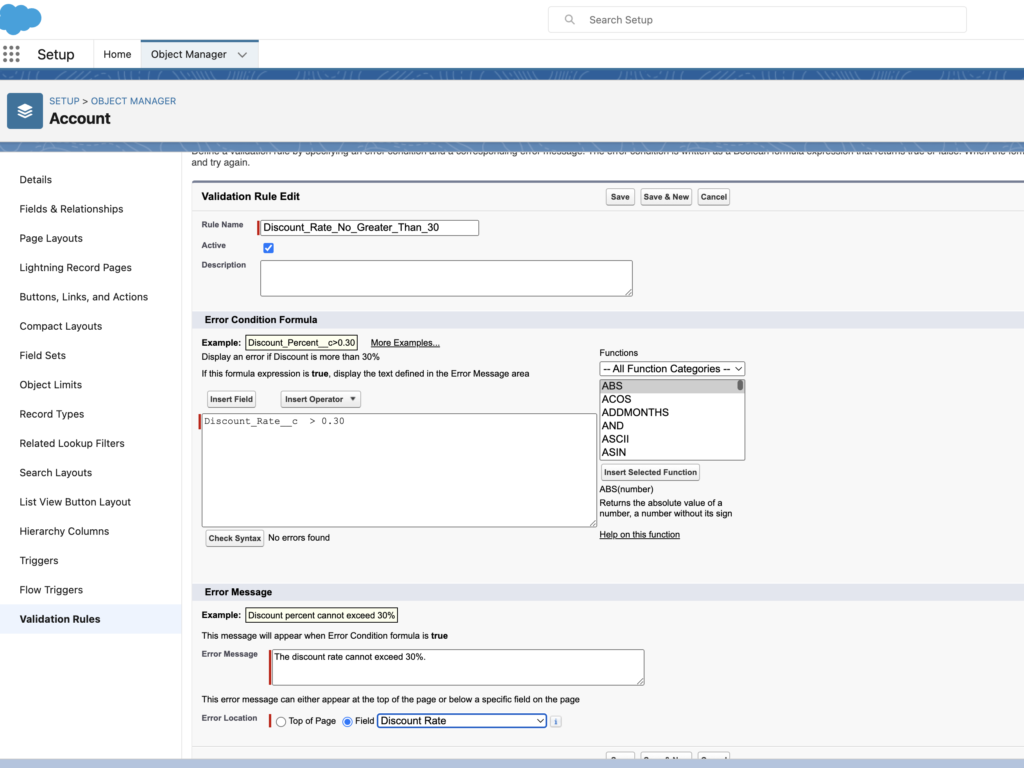
- Give the rule a Name and Description. If you are activating the rule immediately, check the Active If not, uncheck the box. You can come back and activate/deactivate rules after they have been created.
- Create the true/false condition for the rule. I used the Salesforce example for the Discount percentage not being over 30%.
- Click the Check Syntax button to verify your criterion is correct.
- Scroll down the page and enter in the text of the error message you want to display when the rule criteria evaluates to false. You can also choose if the error displays at the top of the page (default) or at the field. When using rules on field values, it can be more helpful to display the error where the data needs to be checked.
- Click the Save button.
- Test the new rule on the organization’s data. Be sure to test for both true and false rule evaluations. Make changes if needed.
- Error Messages will display like this:
Please contact us at info@marksgroup.net for any Salesforce questions or support you need. Feel free to comment below. We’d love to hear your thoughts!

