It’s not unusual to see multiple forms on a given Entity. Take our demo system, Accounts entity, for example!
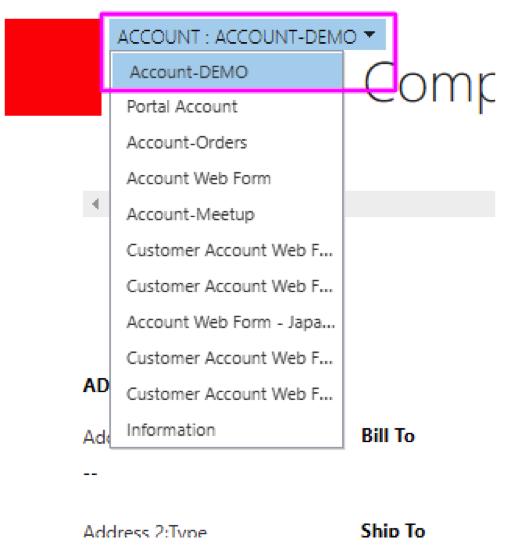
It’s possible to change the default form displayed by Dynamics–for the most part*. If you want to change the Default form, read on!
*Before we go further, a note on the behavior of forms:
If you’re currently using Dynamics and change a form, the form you change it to will become your “Default” form for that entity for the remainder of that session. When you log out completely, and log back in, the “true” system-default form will be displayed first. This is Dynamics’ natural behavior and can’t be changed.
You CAN, however, change the order that entity forms are displayed in, and whatever form is first, is the “true” default form.
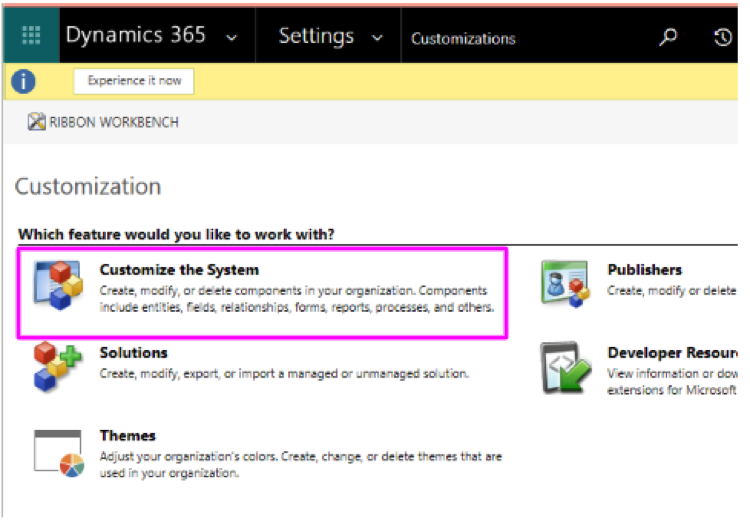
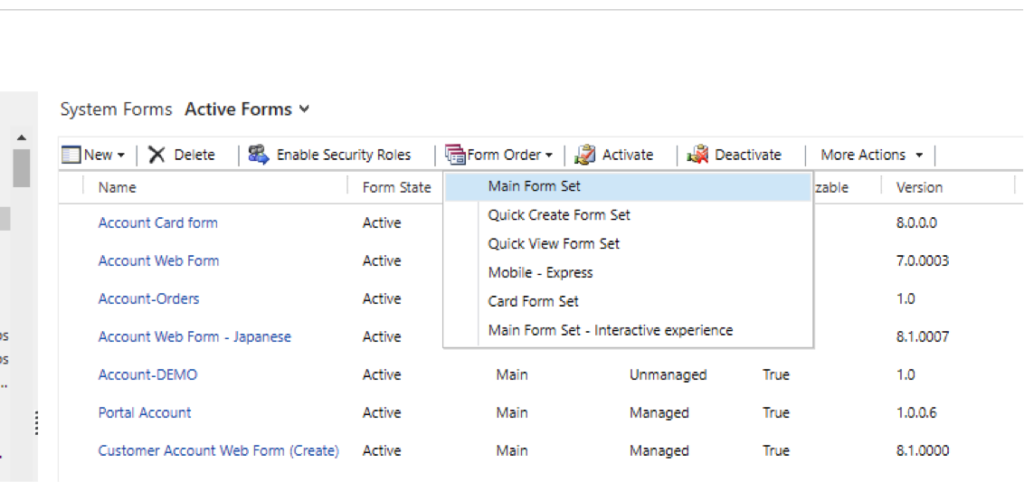
Navigate to Settings->Customizations, then select Customize the System:
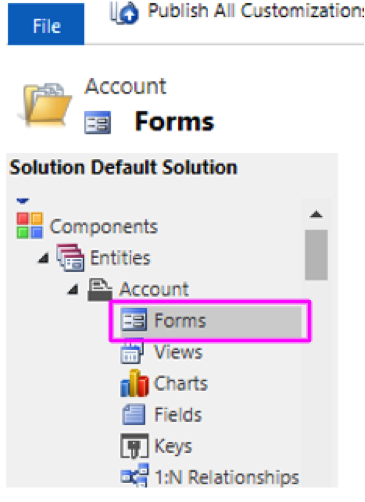
In the Solution, expand Entities and locate the appropriate Entity. Expand the Entity and select “Forms”:
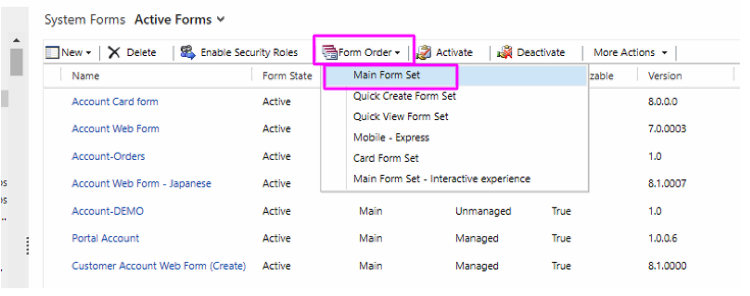
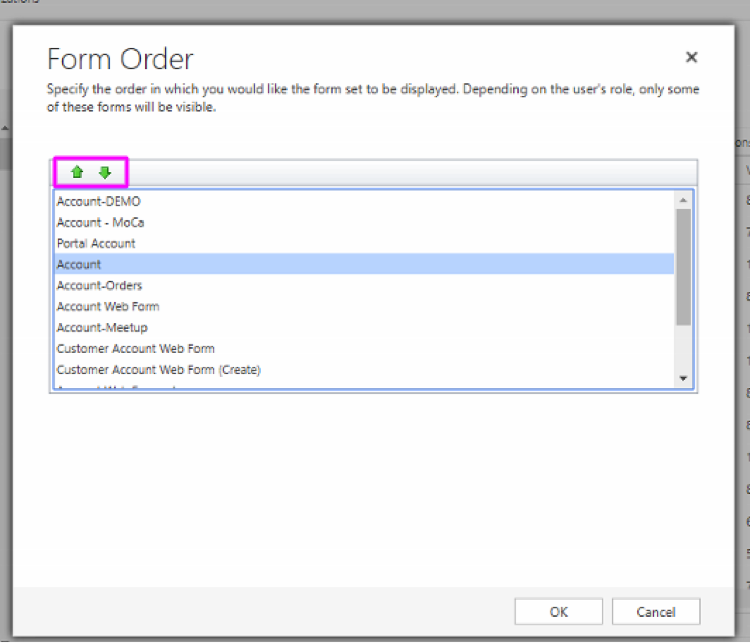
Next, select “Form Order”, then “Main Form Set”:
Select a form and use the arrows to change its position in the list. The very first form is considered the “Default” system form. Click OK when finished:
Publish your customizations–all set!
In this example, “Information” is now the default form for the Account entity. Next time you sign out and back in, that should be the form that is displayed by default.
Hi ,
is there a way to have a default form specifically for the outlook app and a different one for the web site?
Great question! I’m not sure if you can change the default form, but you can choose which forms to use in the Outlook and Mobile apps:
1. Open your solution (Settings–>Customizations–>Customize the system)
2. Scroll down to and select “Model Driven Apps”. It’s outside of the Entity area–towards the bottom of the list.
3. Open Dynamics 365 App for Outlook
4. Under the “Entity View” section, you’ll see the entity name, then “Forms” next to it. Select that, then on the right, uncheck “All”, and select only the form(s) you wish to use. Save and Publish.
Hi, Thanks for the article. I have a question – I designed a D365 app, where I added 3 sub areas under a group which match the same entity(contact) and changed the labels. Is there a way, I can get different default views in these 3 areas on the app? I can see all the selected views in the view dropdown. but currently just one default view pulled for all 3subareas when clicked on, which is set in the solution. Can we change this and add a default view in the app for each section we create?
Your thoughts would be a great input to move forward.
Thanks,
Lakshmi.
Hi Lakshmi,
Great question! I looked into this today and could not find a way to get different default views for different subareas in the sitemap, BUT I do have an idea. First, create new dashboards, one per sub area, and simply include one “List” per dashboard. In that list, you can select the Entity and View you wish to use. So, for the three contact sub areas, you’d create three dashboards, each with one “List” showing a different View. Try going back into the site map again (so, not the “Model-Driven Apps” are, but the “Client Extensions” area of the solution). Once in the site map, select the subarea, then change the TYPE to “Dashboard”. Select the dashboard you want to display by default for that subarea. It’s not a perfect workaround, but I hope that helps! Please feel free to email me with questions, megan@marksgroup.net.